
|
 |
 |
 |
 |
 |
 |
 |
 |
 01-24-2010, 01:30 PM
|
#1 |
|
restorer of the original

Join Date: Mar 2008
Location: Zionsville,PA
Moto: '93 ZR1100 &'73 Kawasaki H1 500
Posts: 1,331
|
Here's step by step instruction ( with pics ) on how to load center fire ammo. I'm doing .357 plinking ammo . The press is a single stage RCBC Rock Chucker, part of the Master Kit I got about 17 years ago.
No cliffs, details are too important to skim over. Also, safety glasses would be good to wear at all times. Click the pictures for large view. 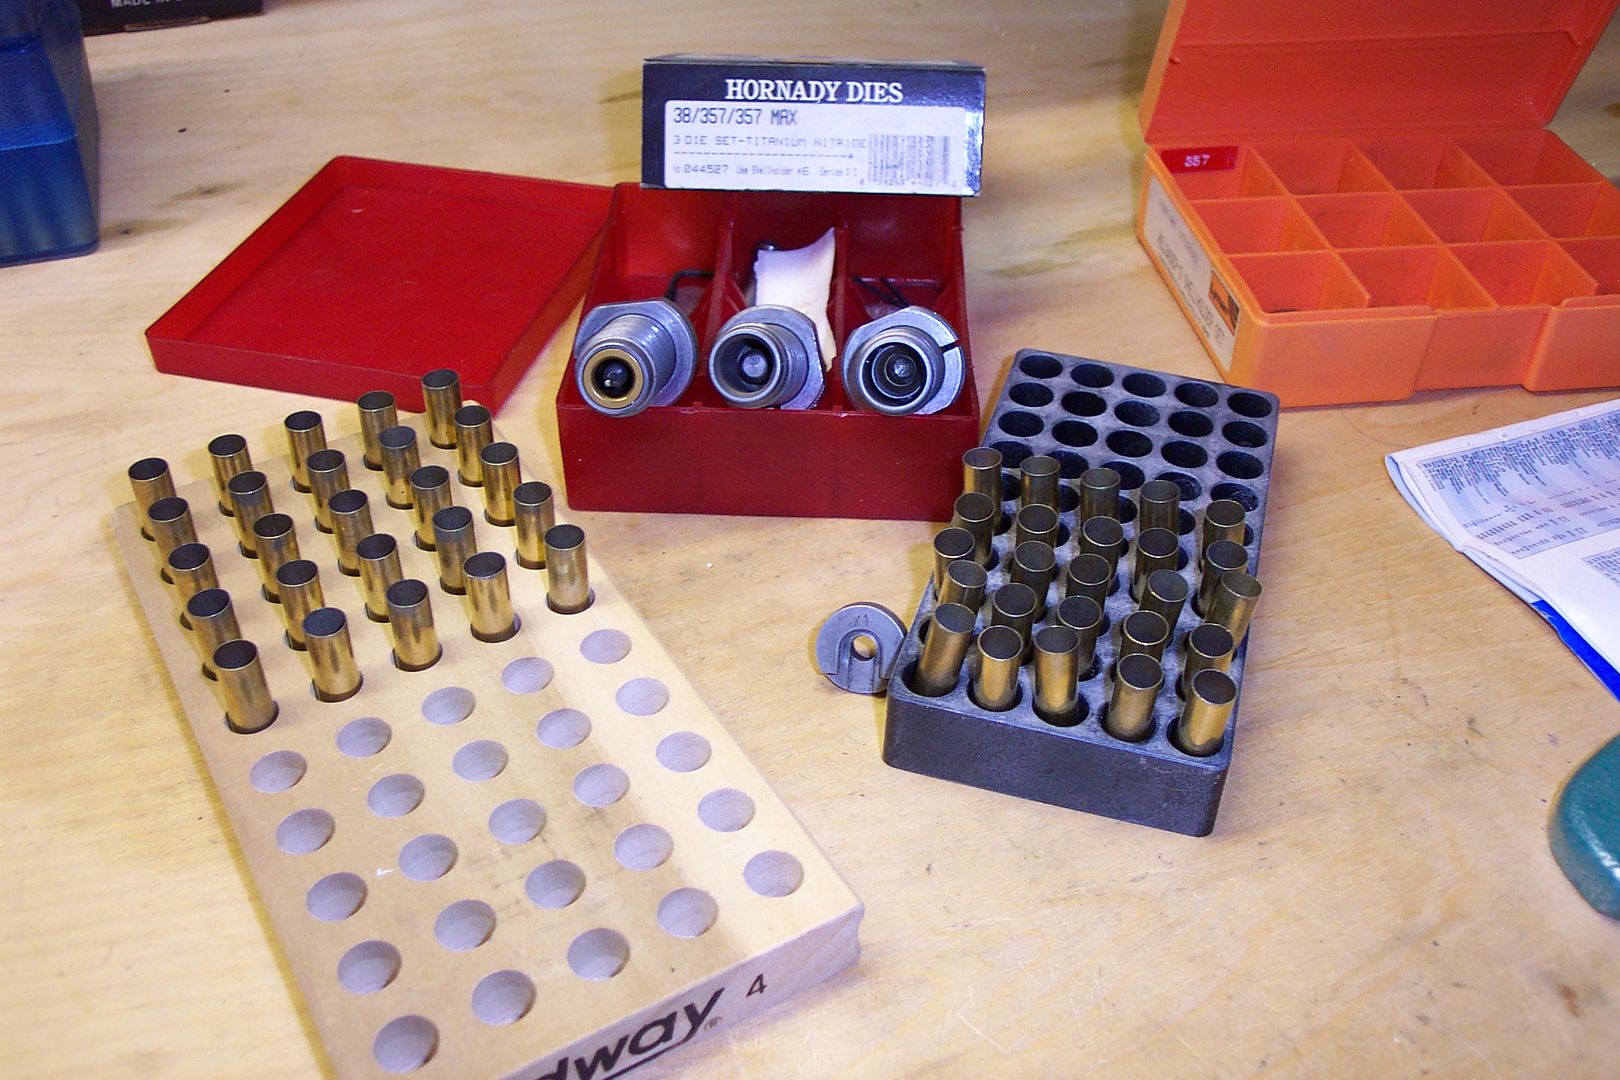 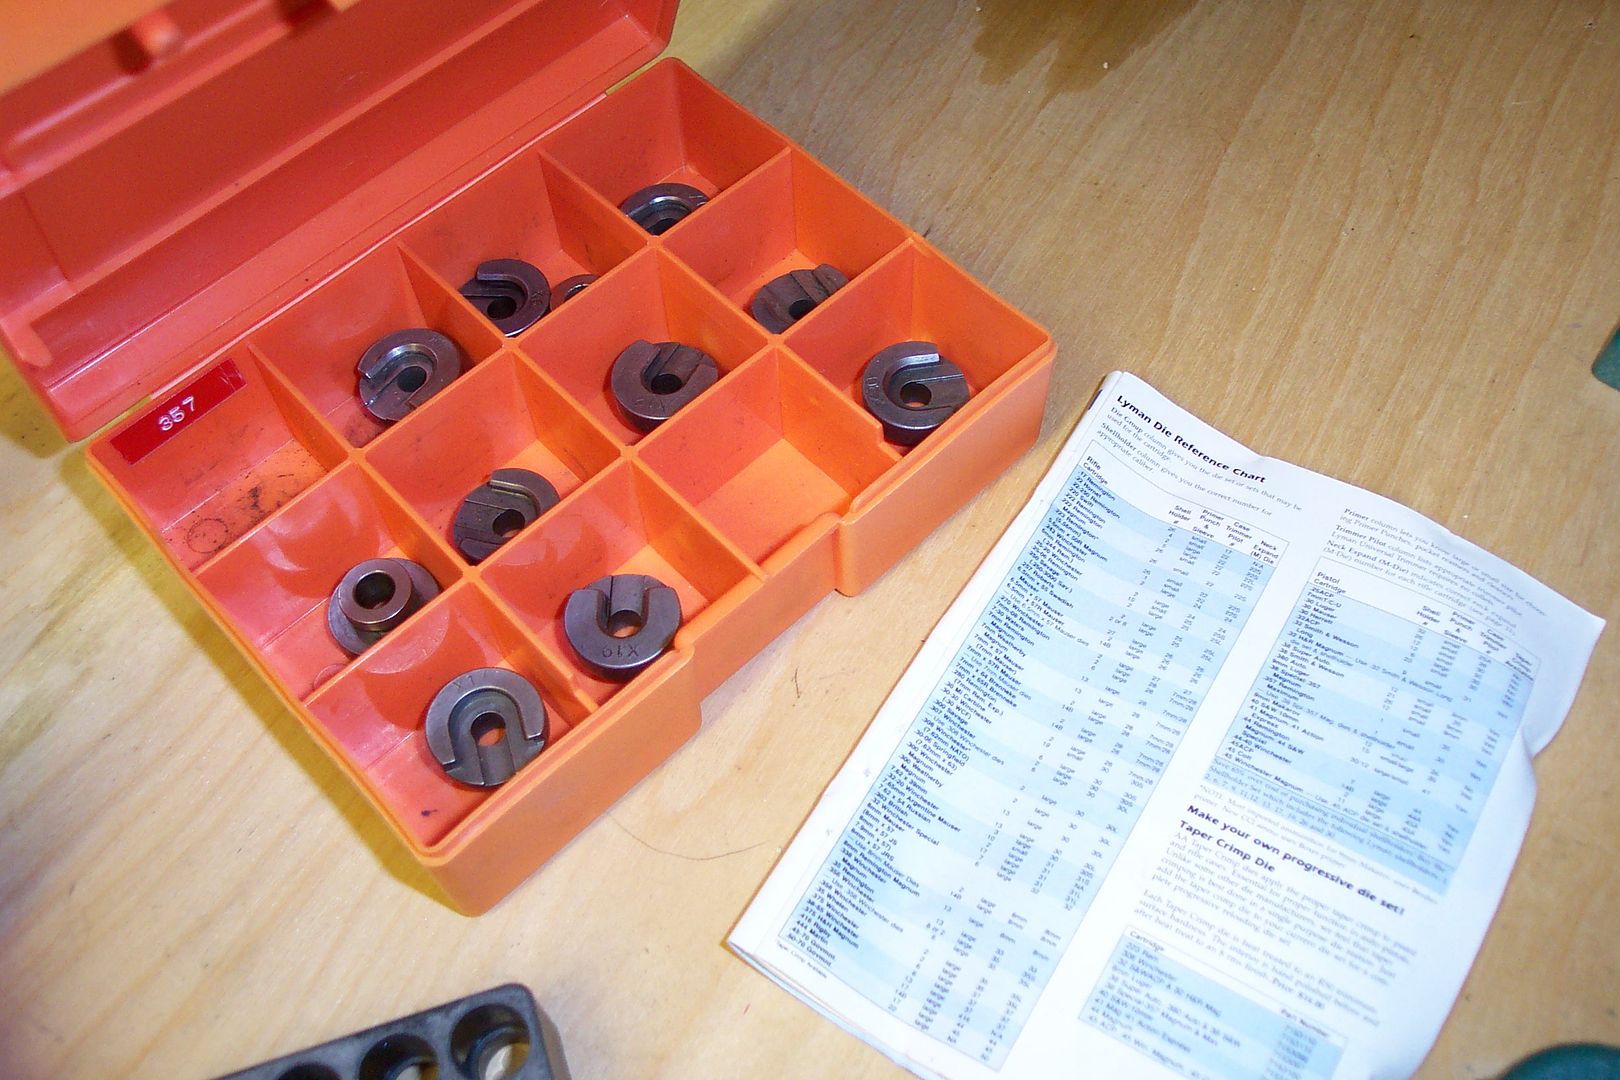 Above is the once fired cases, a set of reloading dies and in the orange case, shell holders. Notice the titanium ring on the left die. If you have titanium nitride or carbide insert resizing dies, you do NOT have to lube the cases for resizing. Pick the correct size shell holder ( from the chart and place that in the press ram. Screw in the resizing die until it almost touches and resize you cases. Check for overall length after resizing. Trim and deburr if necessary. 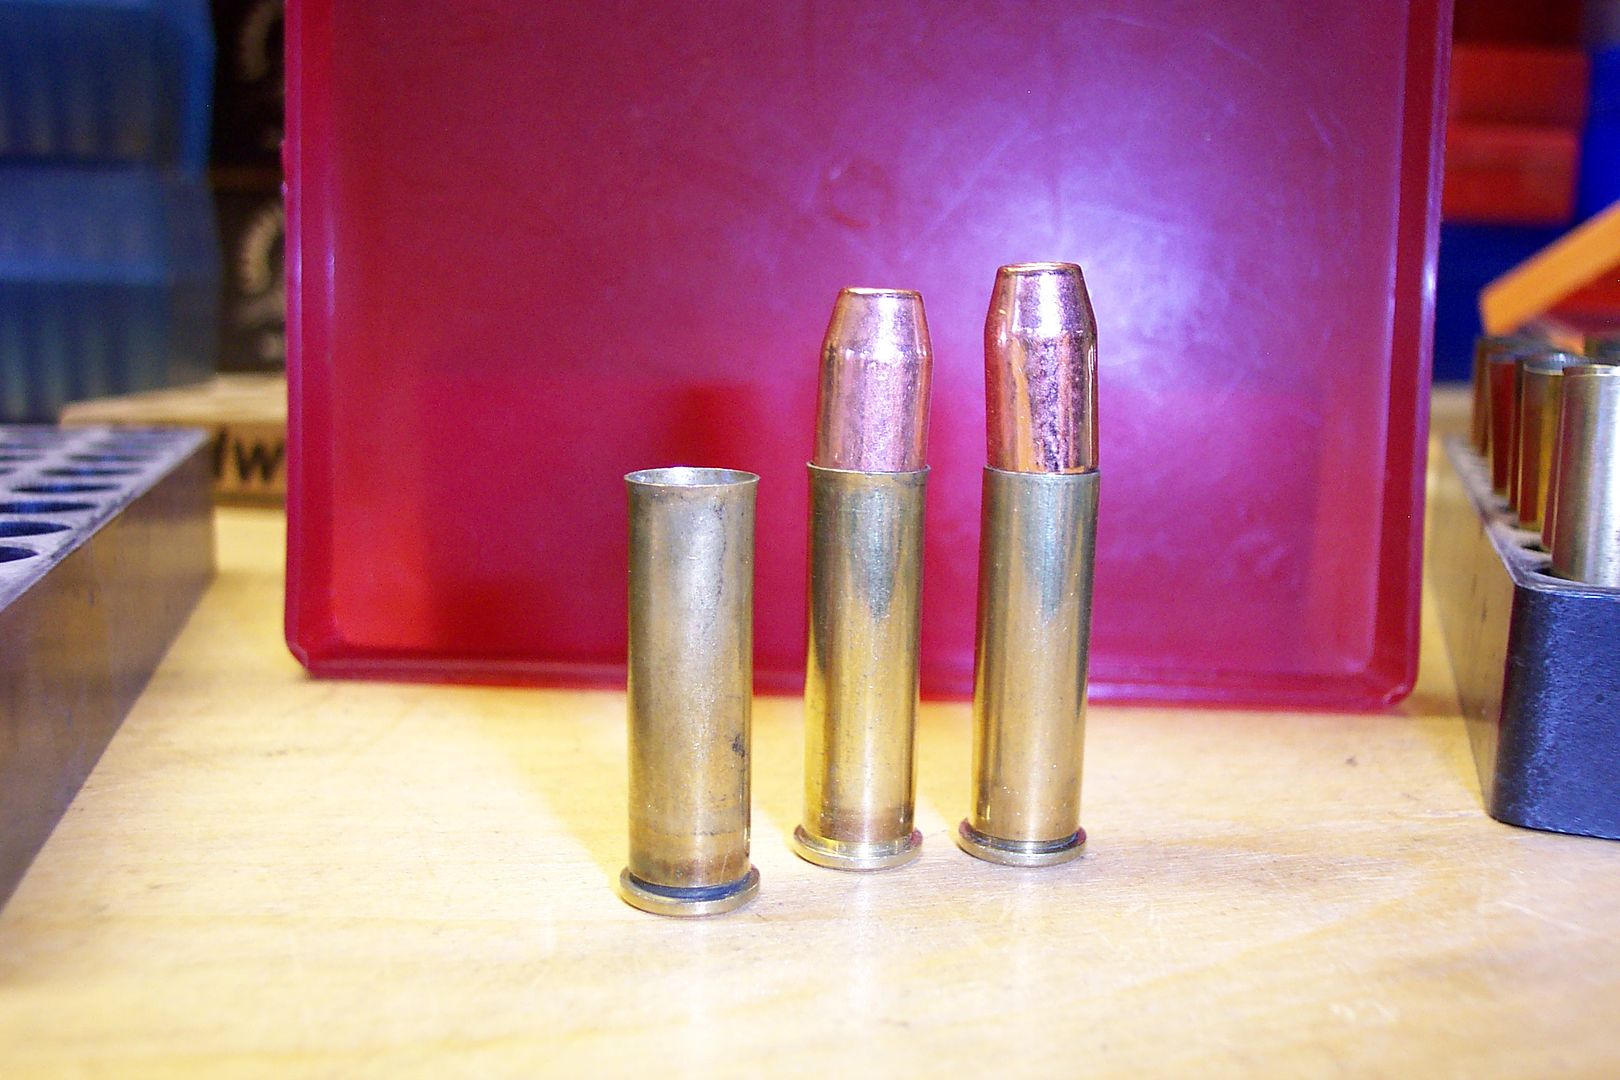 Next step is to make a slight bell in the case opening. All you need is just enough for the bullet to start. The left and middle cases are belled while the right case is resized only. Also during this time, check your cases for any defects ( cracks etc ). If in doubt, throw it out  ( like the case below- the end looks funny and it got tossed) ( like the case below- the end looks funny and it got tossed)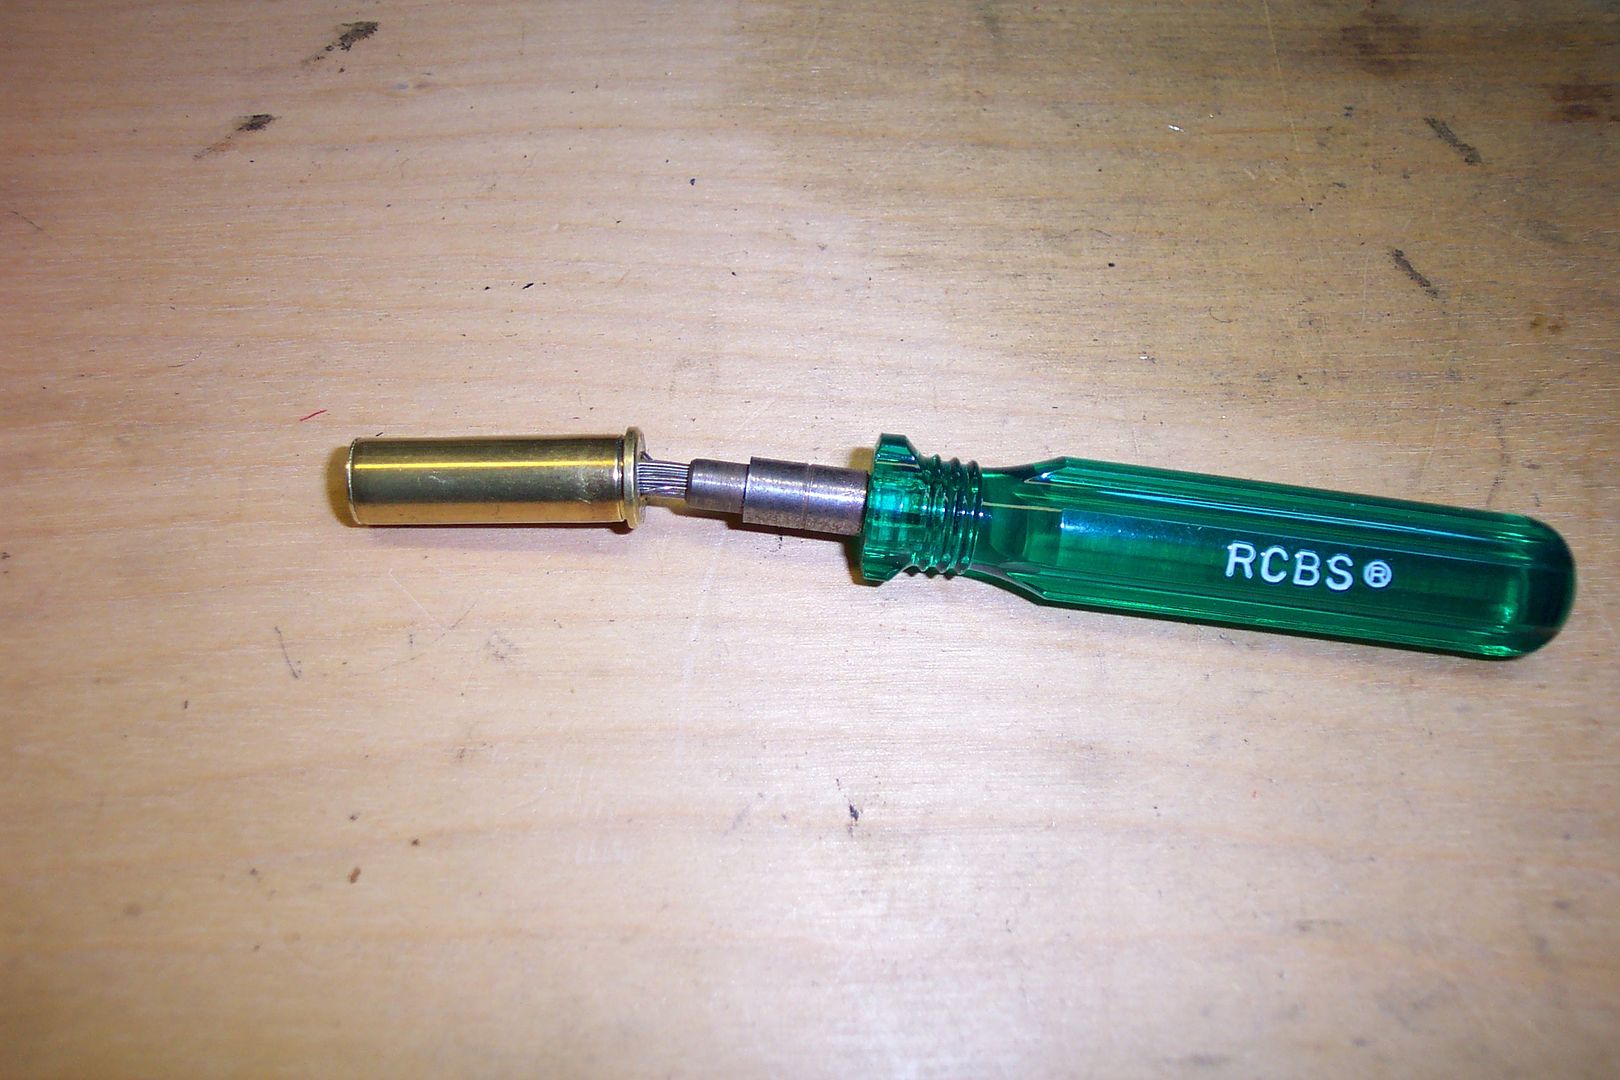 Using a primer pocket brush, clean the primer pocket to remove any burnt residue from the previous primer. 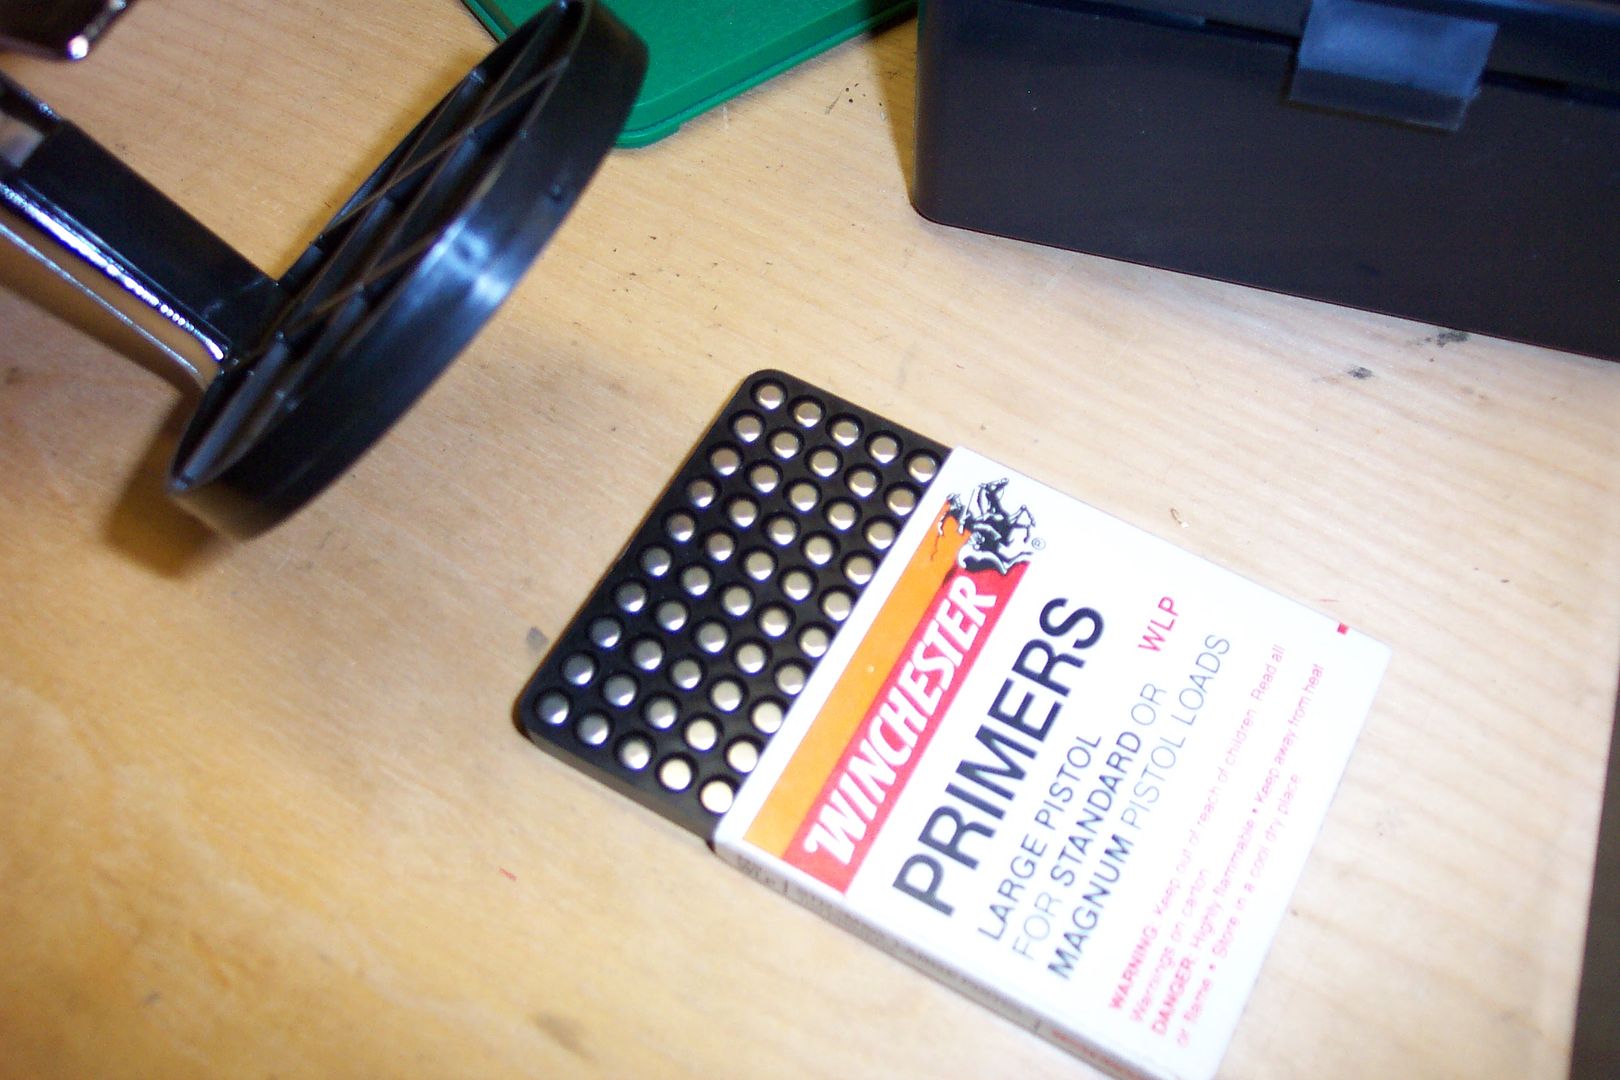 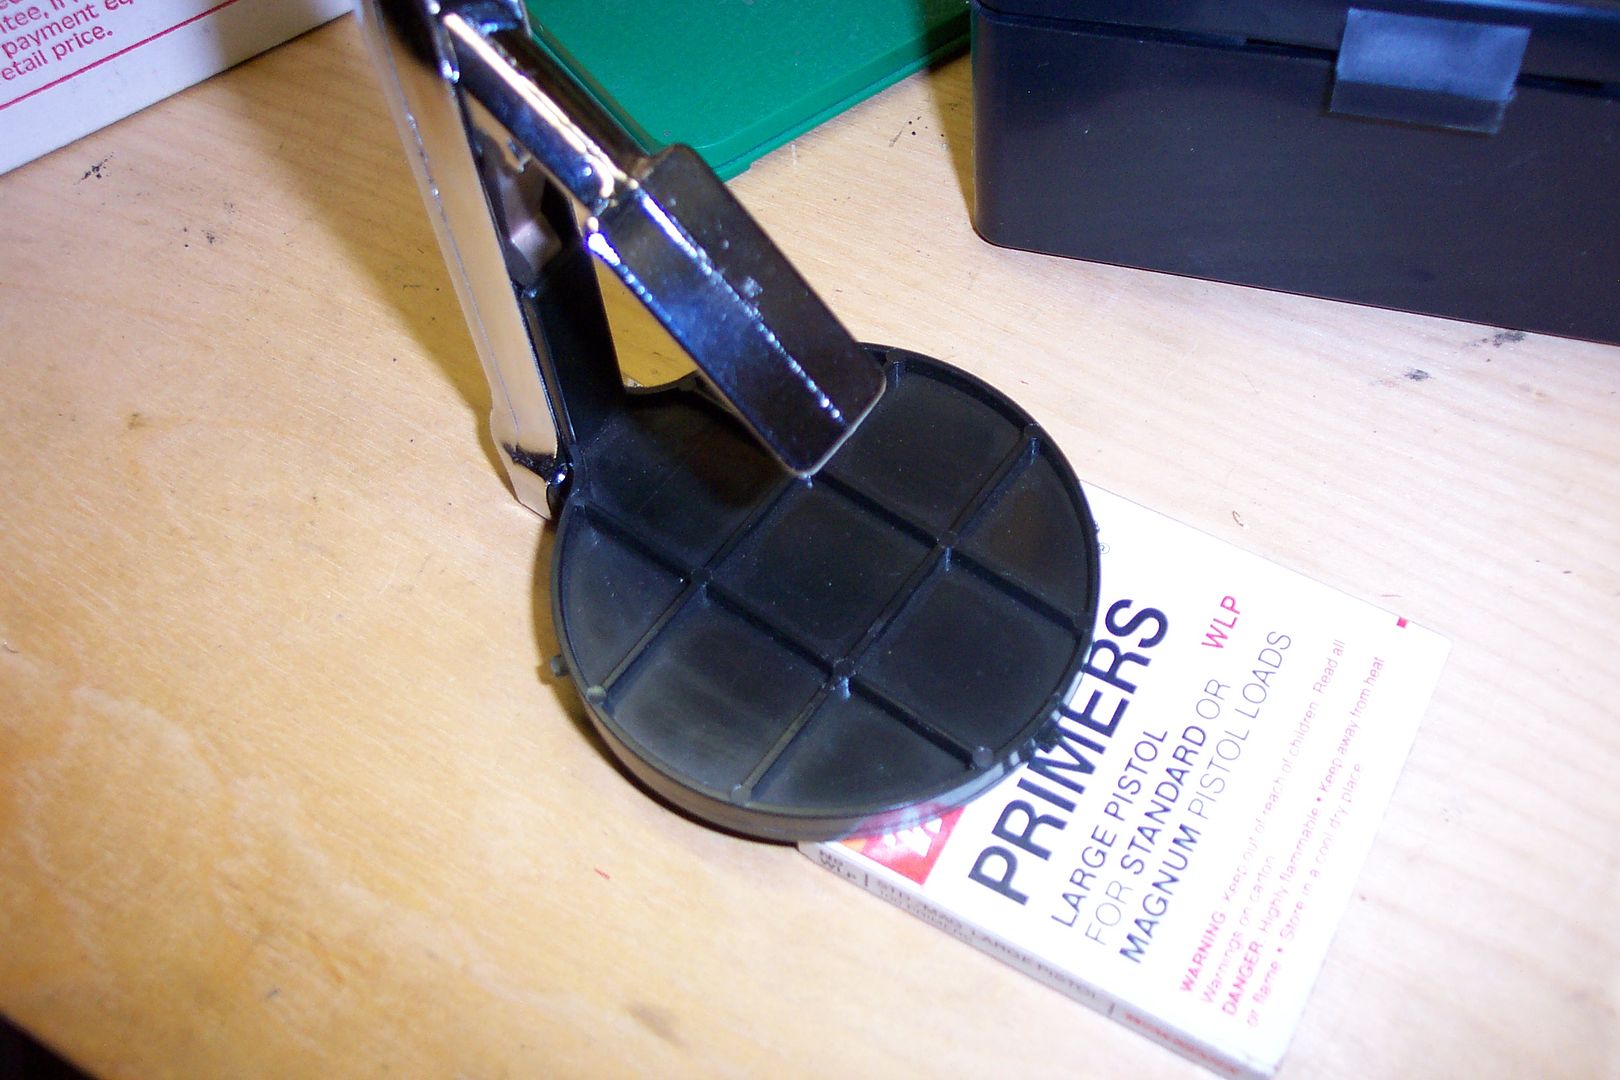 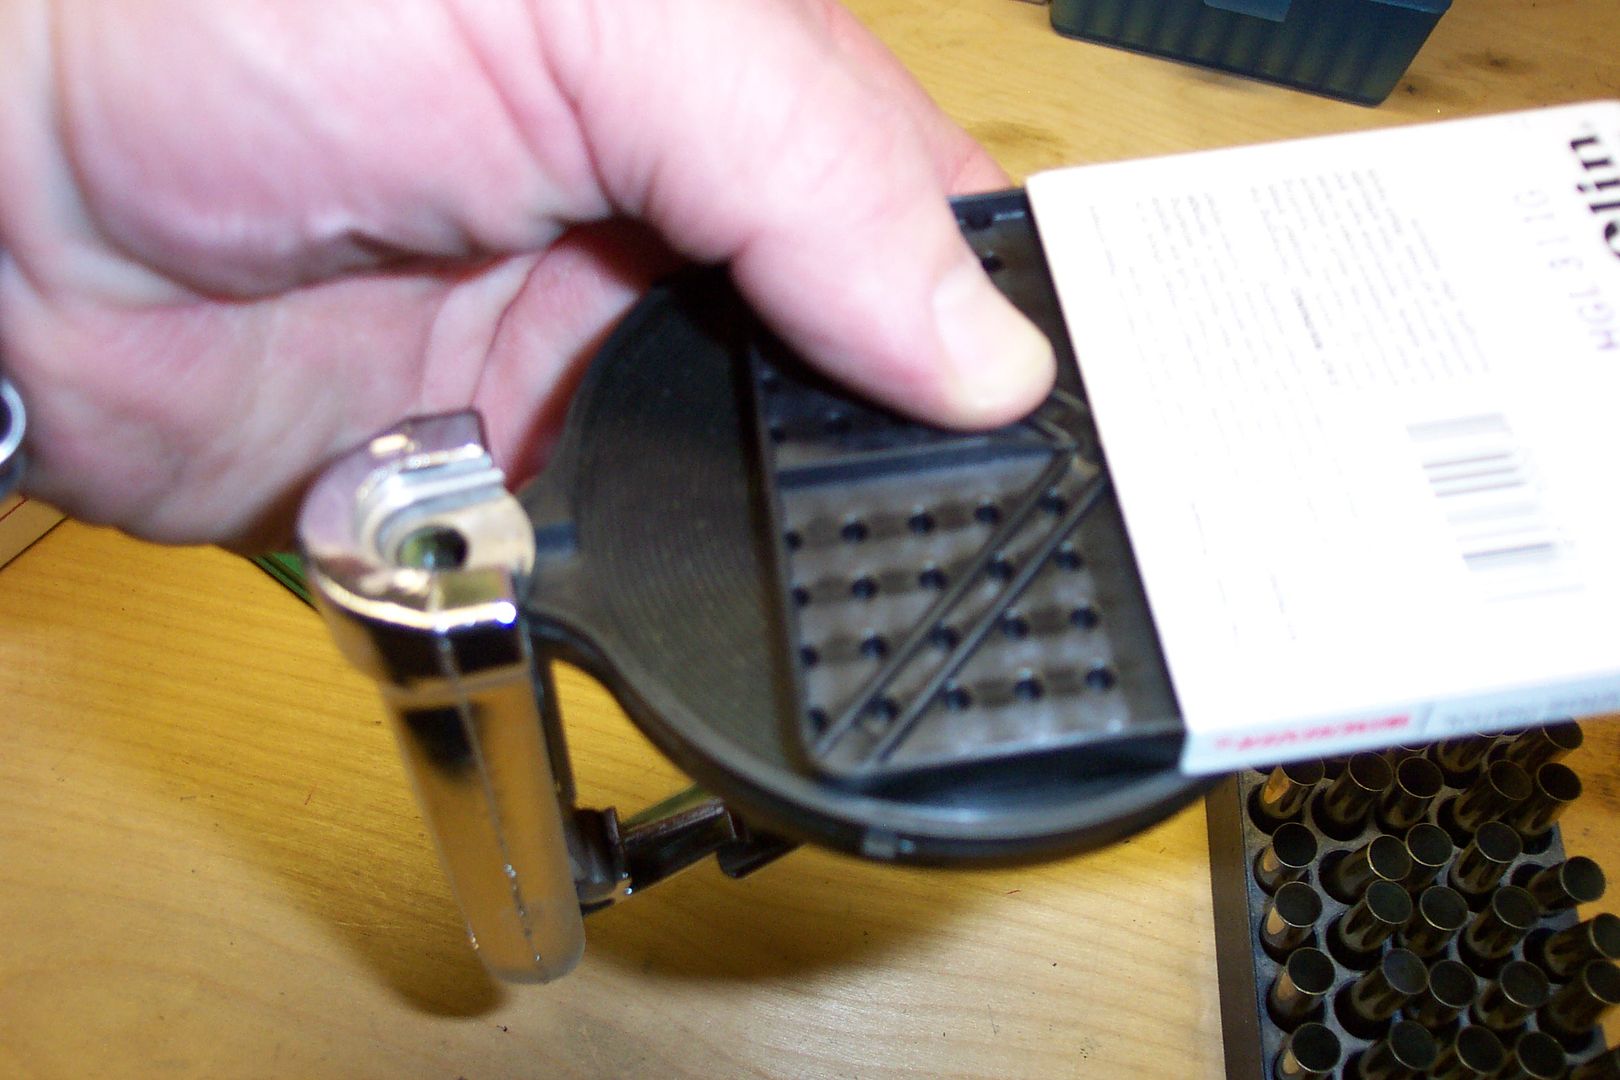 Above is the easiest way I've found to load the primer tool. Open pack to the required amount ( I usually do no more than 50 primers myself ), place the tray over it and while holding them together, turn it over. Remove primer package and make sure all are facing the correct way ( explosive primer compound UP ). ( note-these are large pistol primers which are not correct for .357 cases-- I primed some .44 mag cases ) 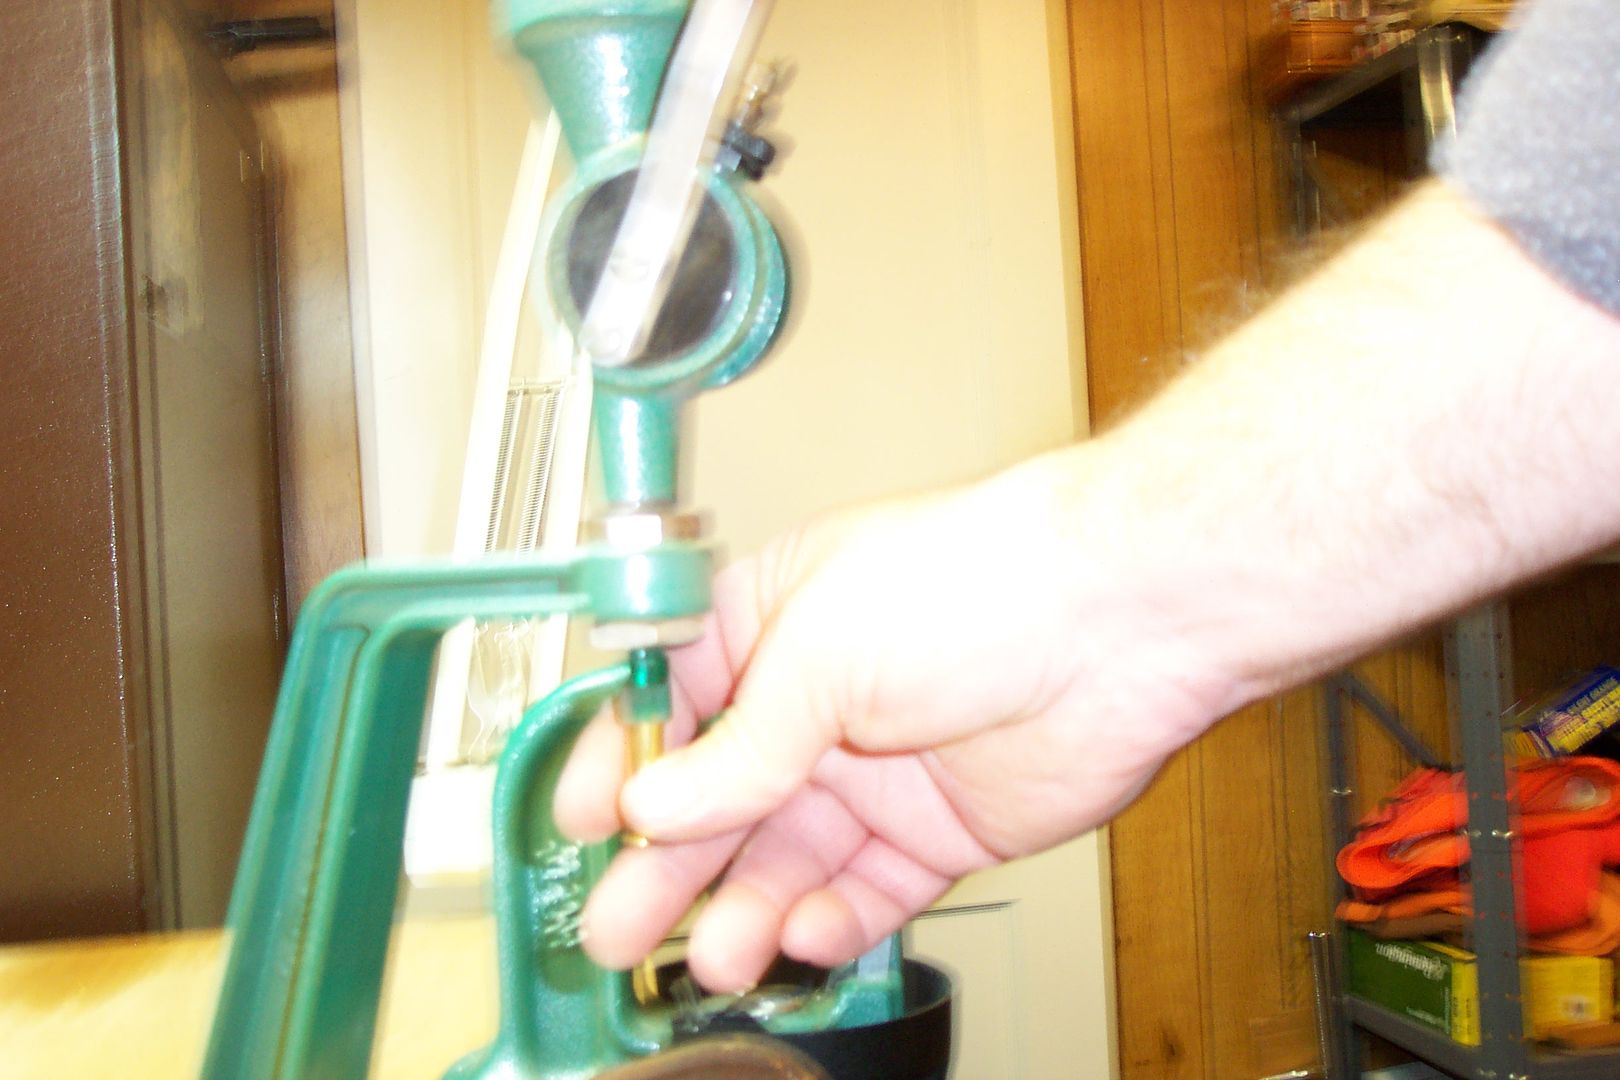 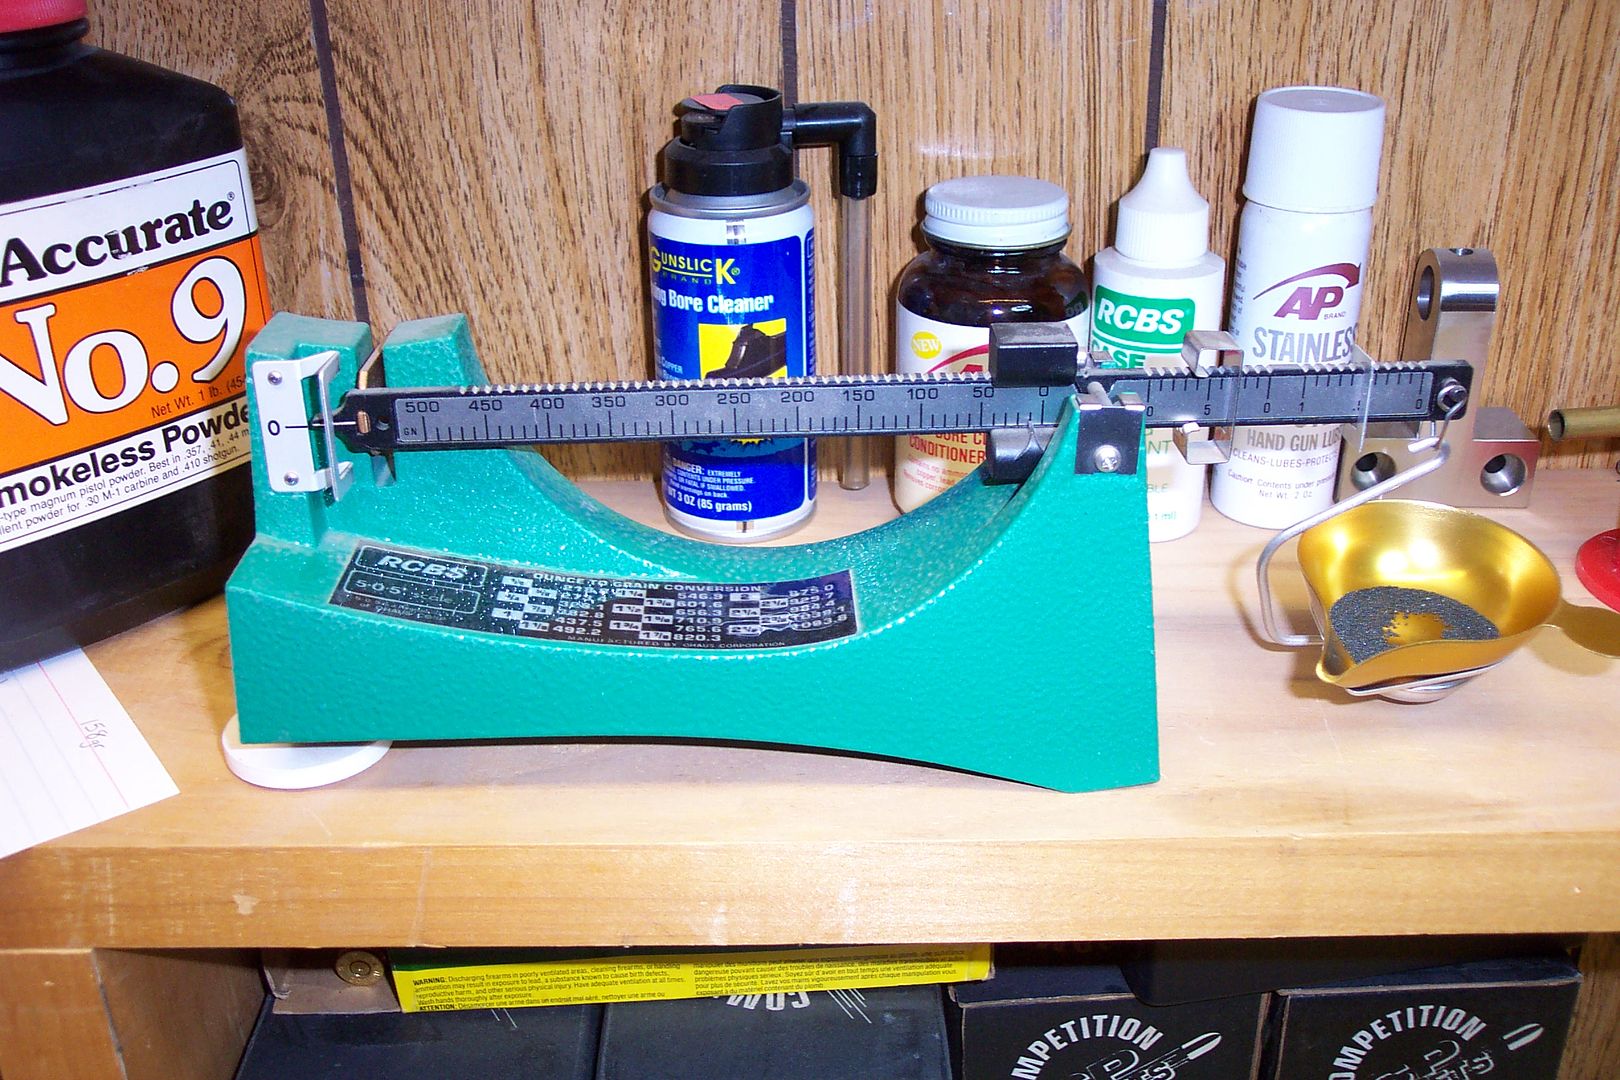 After you have verified the correct powder, weight of charge for the bullet weight, throw and adjust the charge until it weighs correctly on the scale. I have found the best way to get a more consistent charge on my powder throw is to "click" the handle twice ( lightly ) where it picks up the powder charge. I put the primed, bell case under the powder throw and place a charge. I check ever 10th charge on the scale. If it varies , I dump those previous 10 and do it again. 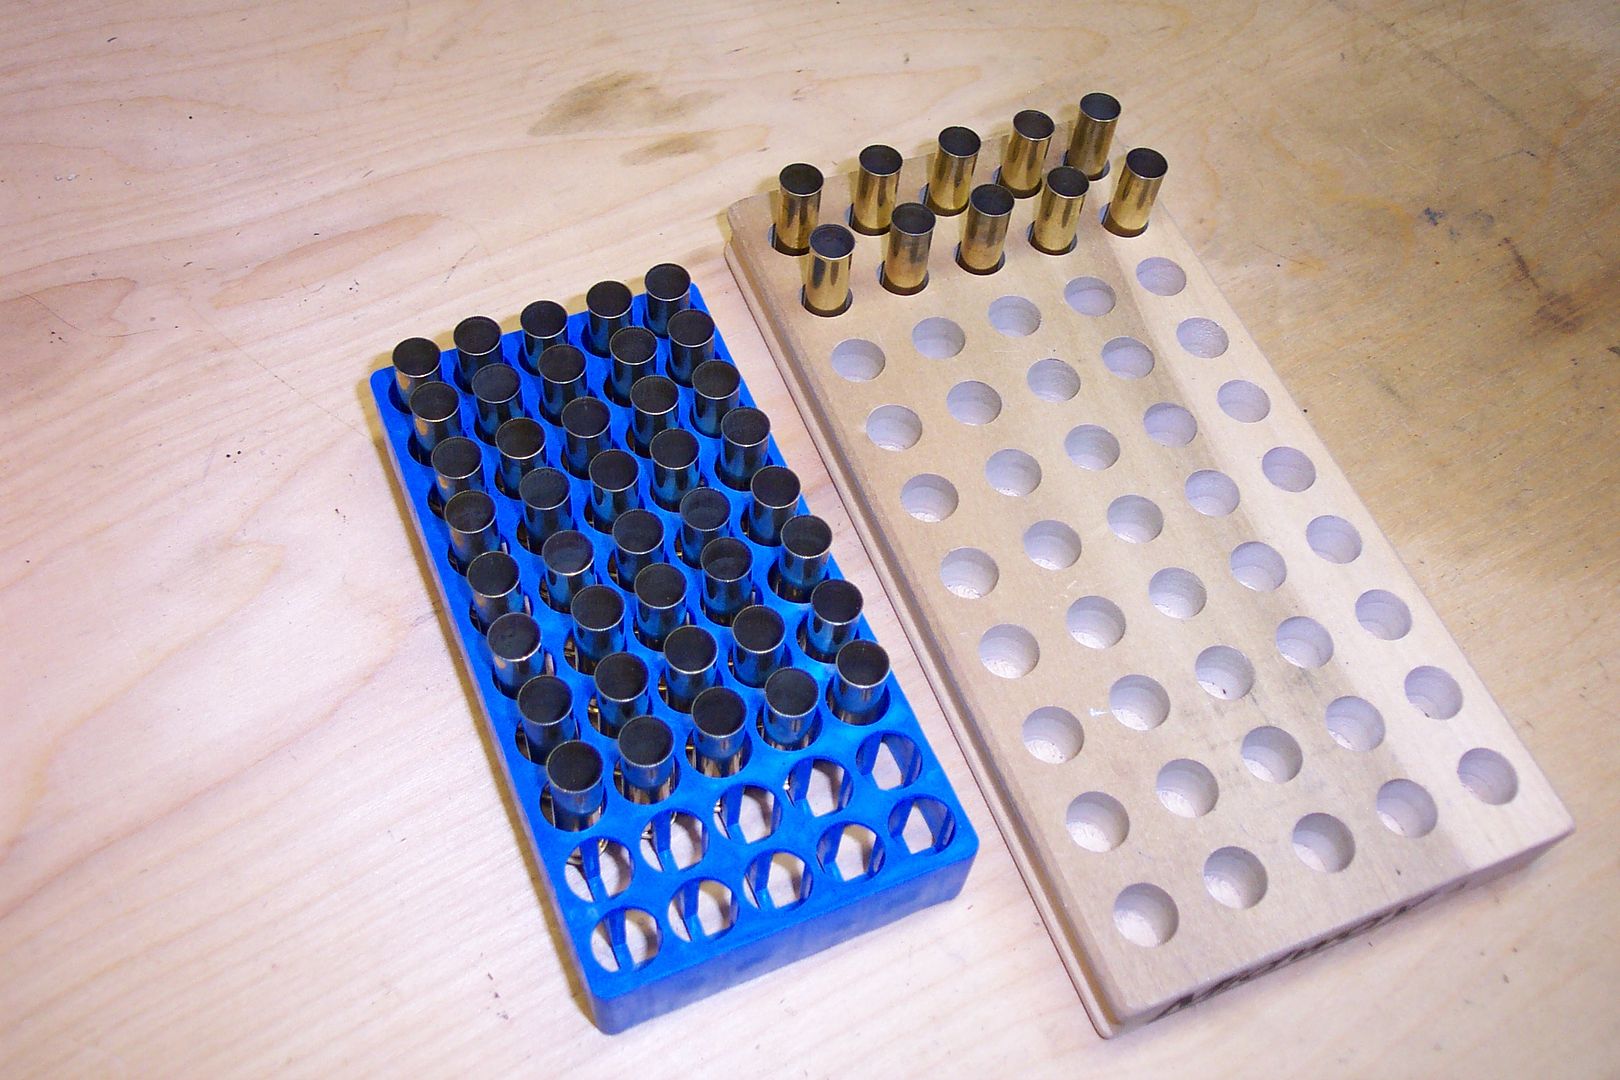 I always work from one tray to another. My primed, belled cases are in the blue tray. I pick one up, place it under the powder throw, place and charge and it goes in the wooden tray. This way if they are handled, they get powder. :thumbs: 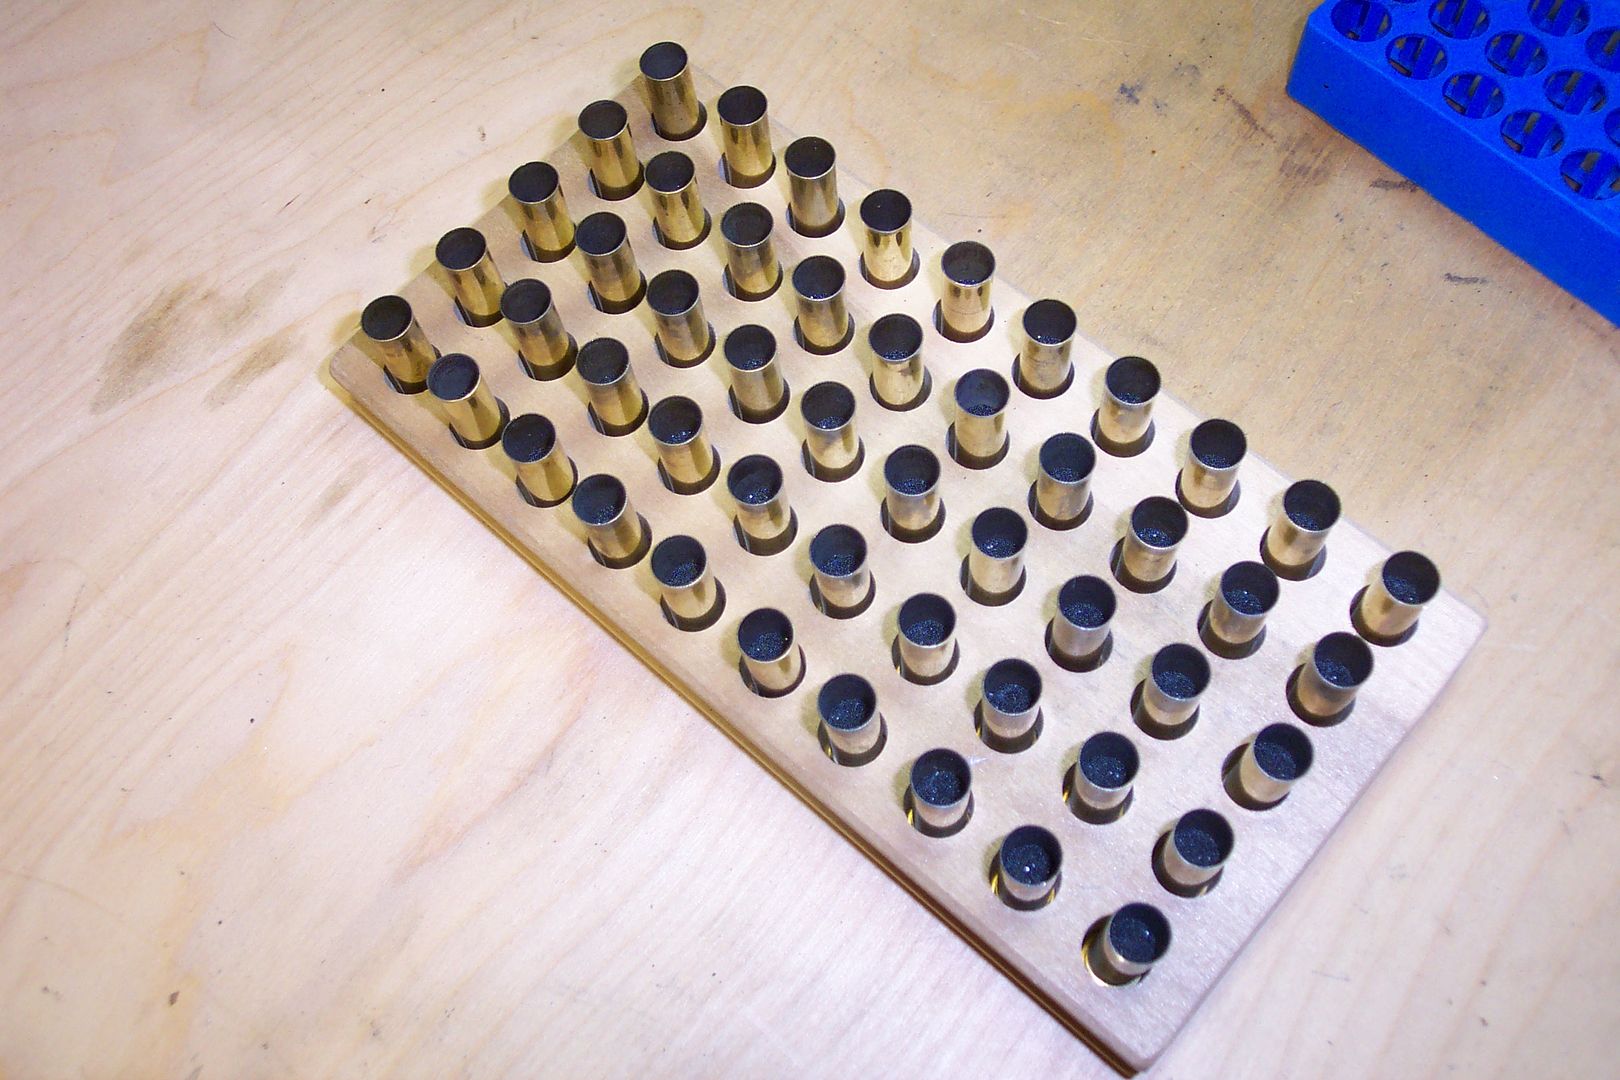 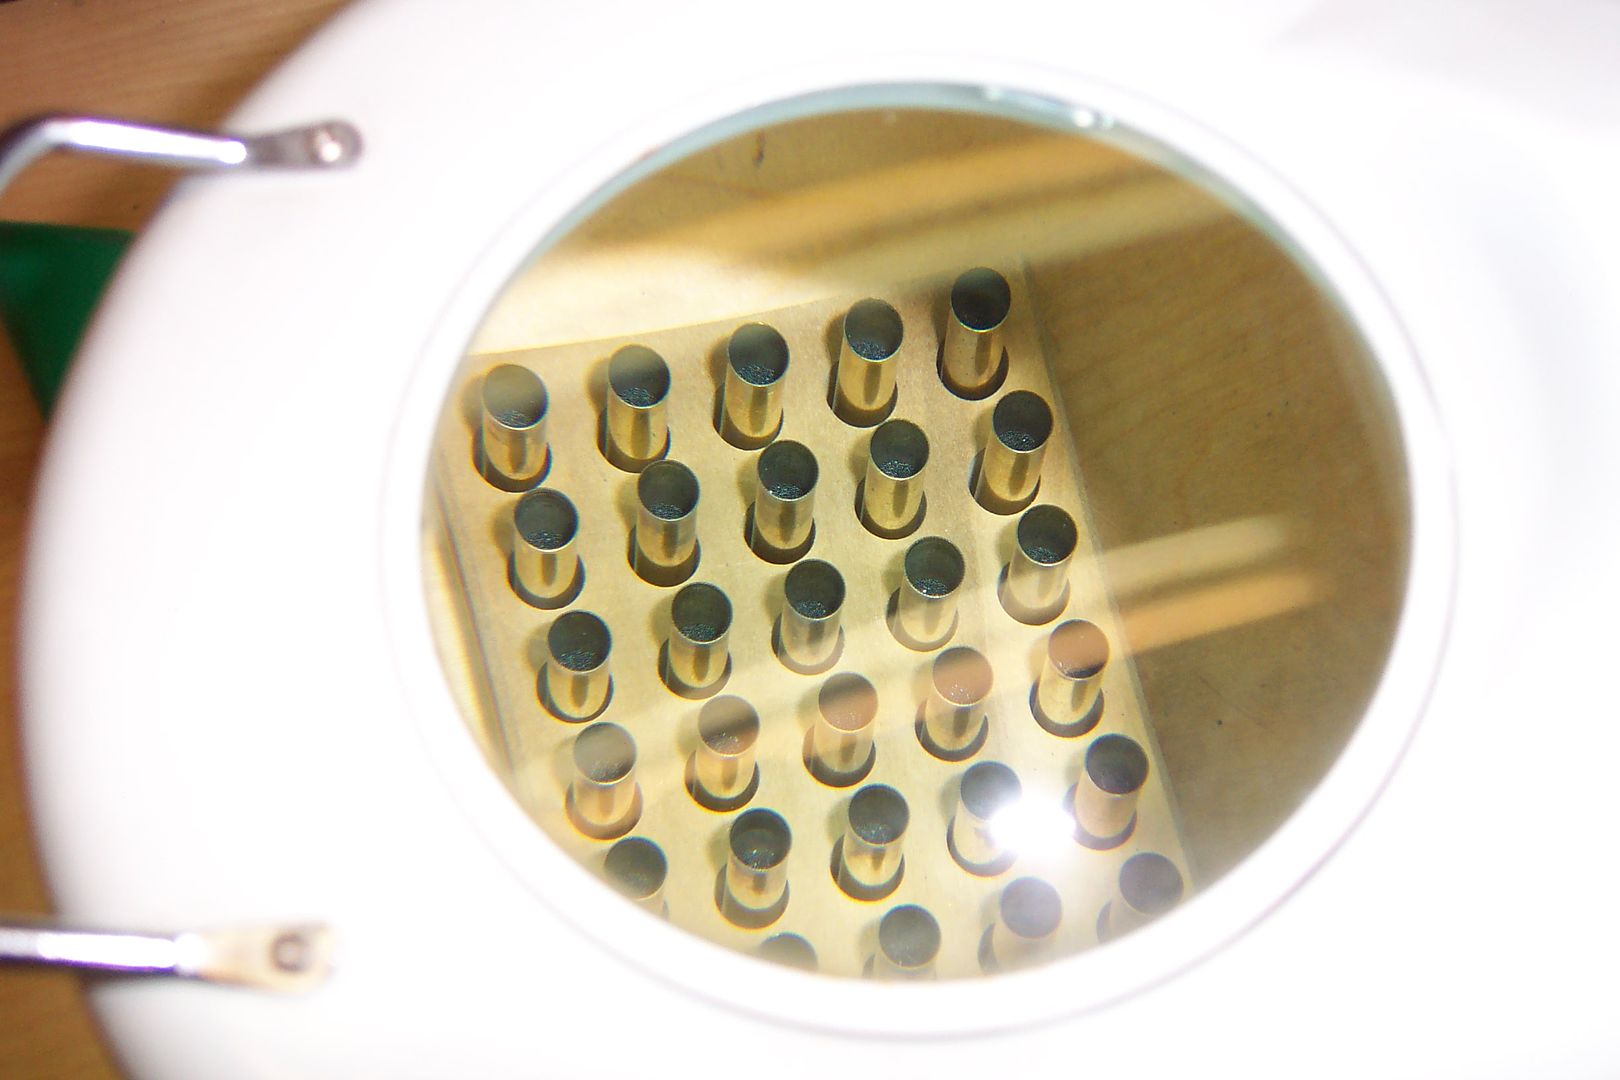 Look into each and every case for the same powder level. If it doesn't look right, dump the powder back in the powder throw and do it again. A missing/light charge could lodge a bullet in the barrel and the next round fired could blow up the gun. A double charge could blow up the gun in your hands. Neither is a good thing  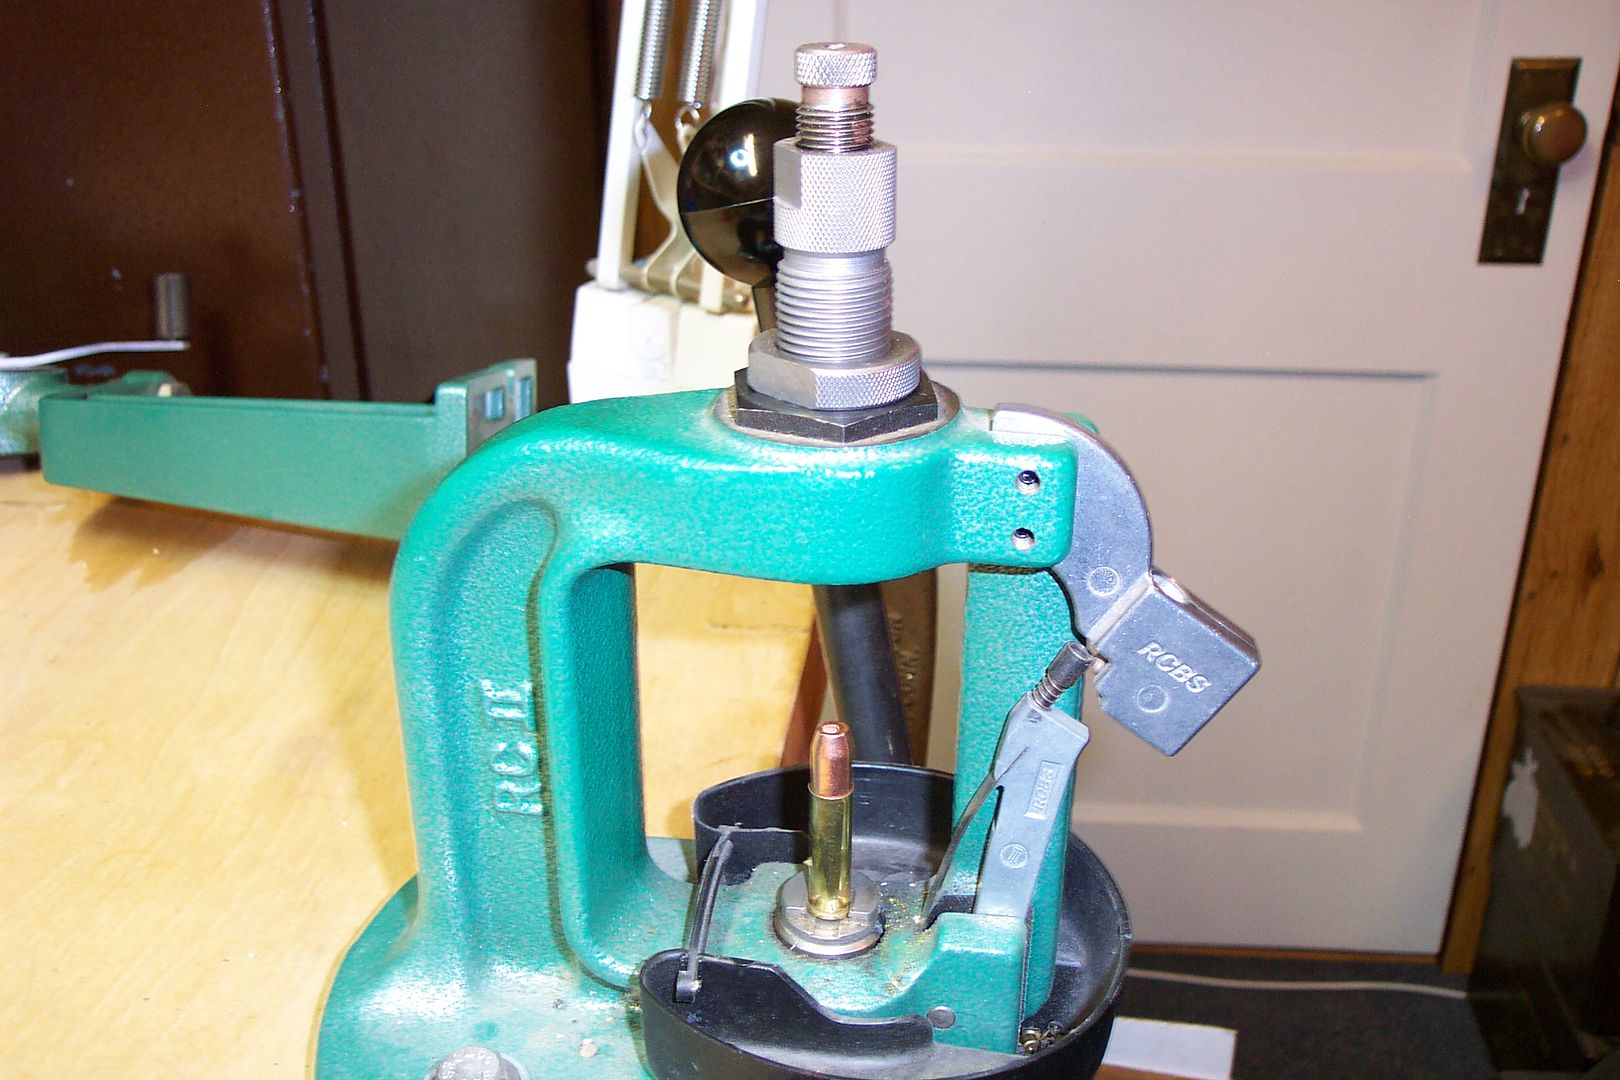 Now you will be seating bullets. The main die section height controls the crimping of the bullet and the threaded portion controls the bullet height ( and overall length) Too much crimp with smash/crinkle the case and not enough crimp will let the bullet move in the case. In the case of a revolver, too light a crimp will allow the bullet during the firing of the other rounds and it may jam the cylinder ( keep it from turning ) 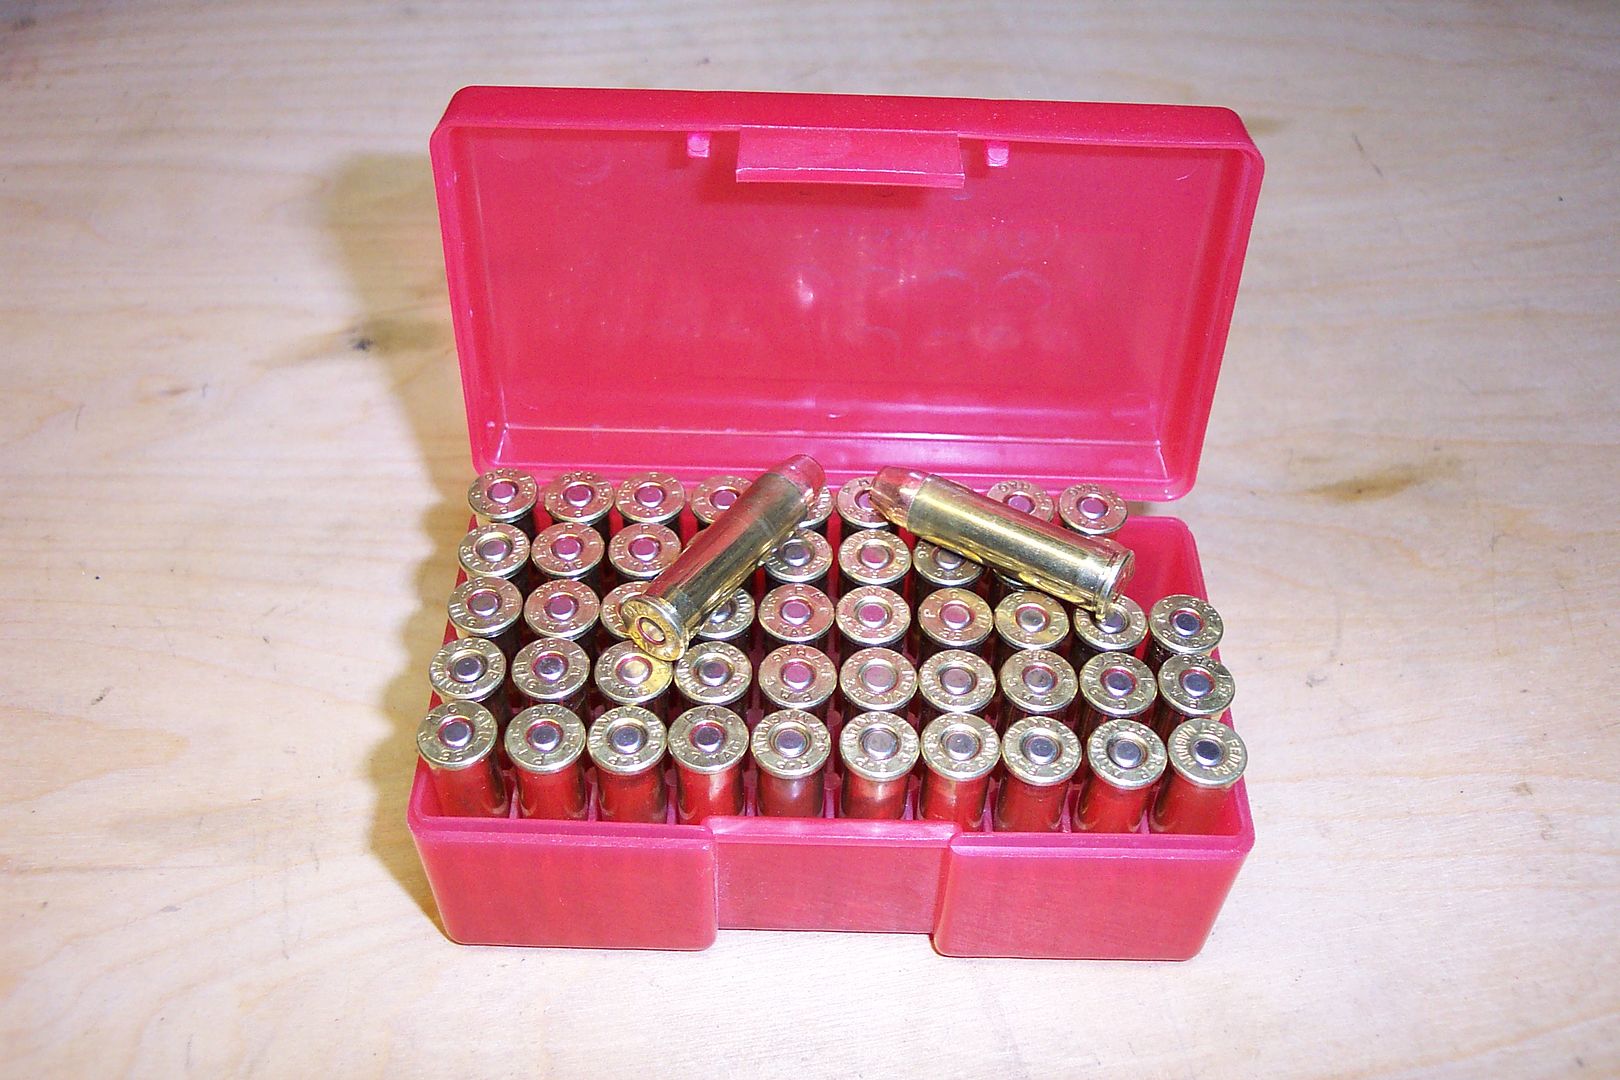 Here we are after loading 50 rounds Be safe, have fun and enjoy Jeff |

|

|
| Bookmarks |
|
|


 Threaded Mode