
|
 |
 |
 |
 |
 |
 |
 |
 |
|
|
 05-23-2008, 10:20 AM
|
#1 | ||
|
DefenderOfTheBuelliverse
 
Join Date: Feb 2008
Location: Parts Unknown
Moto: Buell XB12R
Posts: 18,585
|
Quote:
__________________
 Quote:
|
||

|

|
|
05-23-2008, 04:24 PM
|
#2 | |
|
Trip's Assistant
 
Join Date: Feb 2008
Location: Imported from Detroit
Moto: 2009 HD Street Classic
Posts: 12,149
|
Quote:
|
|
|
|
|
|
05-23-2008, 11:49 PM
|
#3 | |
|
Pompous Prick

Join Date: Mar 2008
Location: MA
Moto: 06 R6 (race), 04 CRF Tard (race)
Posts: 3,040
|
Quote:

__________________
LRRS/CCS #123 Boston Moto Dunlop Woodcraft 35 Motorsports Sidi Pit Bull K&N Filters |
|
|
|
|
|
05-24-2008, 10:27 AM
|
#4 |
|
orangina Zed

Join Date: Feb 2008
Location: LI, NY
Moto: '12 Z1000
Posts: 700
|
^^^^^^

__________________

|
|
|
|
|
05-24-2008, 03:40 PM
|
#5 | ||
|
DefenderOfTheBuelliverse
Join Date: Feb 2008
Location: Parts Unknown
Moto: Buell XB12R
Posts: 18,585
|
Quote:
__________________
Quote:
|
||
|
|
|
|
05-25-2008, 02:14 AM
|
#6 |
|
⎷⎛⎝ ⎝⏠⏝⏠⎠ ⎷⎛⎝

Join Date: Feb 2008
Location: ⎷⎛⎝ ⎝⏠⏝⏠⎠ ⎷⎛⎝
Moto: ⎷⎛⎝ ⎝⏠⏝⏠⎠ ⎷⎛⎝
Posts: 990
|
Lookin good duder, the white gives it a professional look. Deff needs some inspirational posters of Rossi and such.
__________________
 
|
|
|
|
|
05-25-2008, 11:31 PM
|
#7 | |
|
Pompous Prick
Join Date: Mar 2008
Location: MA
Moto: 06 R6 (race), 04 CRF Tard (race)
Posts: 3,040
|
Gotten a lot done so far this weekend, and more will be done tomorrow. Oh boy is it getting fucking sweet now
 Quote:
__________________
LRRS/CCS #123 Boston Moto Dunlop Woodcraft 35 Motorsports Sidi Pit Bull K&N Filters |
|
|
|
|
|
05-28-2008, 01:14 AM
|
#8 |
|
Pompous Prick
Join Date: Mar 2008
Location: MA
Moto: 06 R6 (race), 04 CRF Tard (race)
Posts: 3,040
|
This long weekend I was able to get a lot of the final things done. I'm really psyched right now. Most of these things didn't require a ton of work, but they make such a huge difference towards the appearance of being done that it really looks great now.
I did the final coat of paint all around. I also repainted parts of all three of the thresholds in black, since they got joint compound and/or paint on them. Other little black trim stuff outside was also given another coat. Here's the final coat of paint: 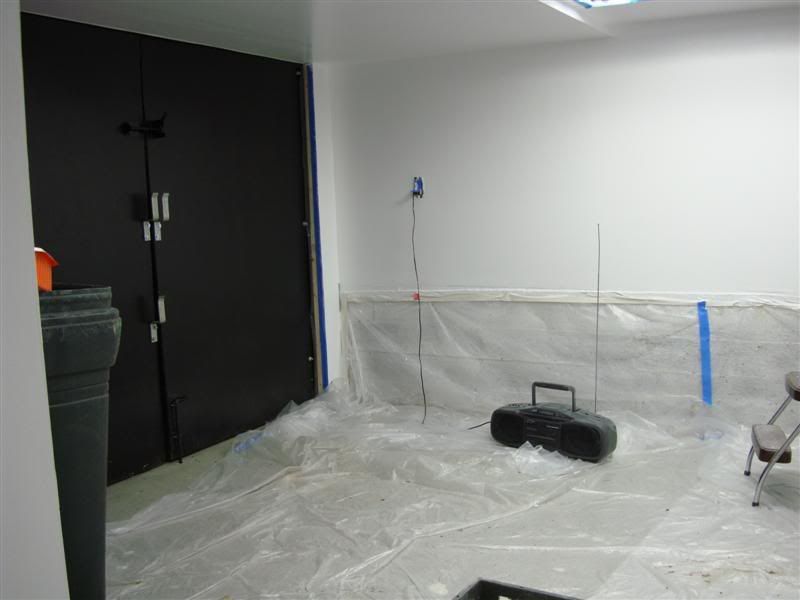 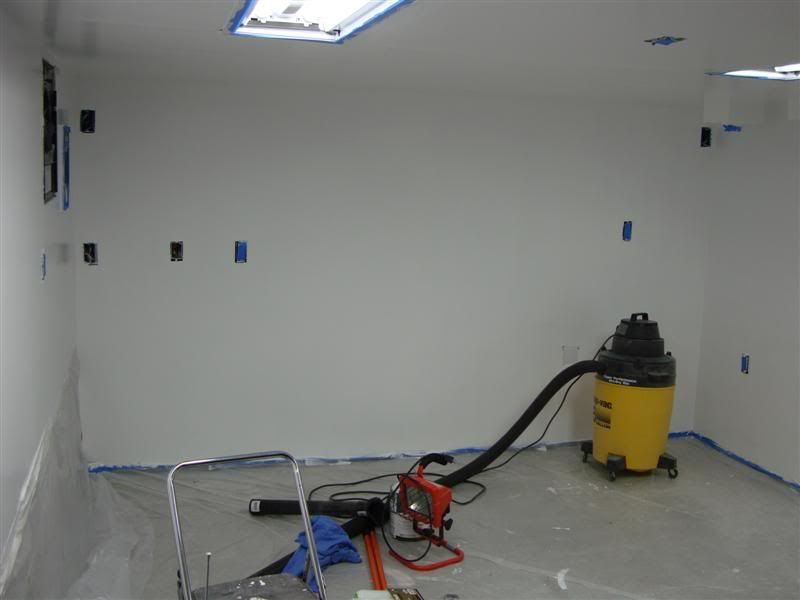 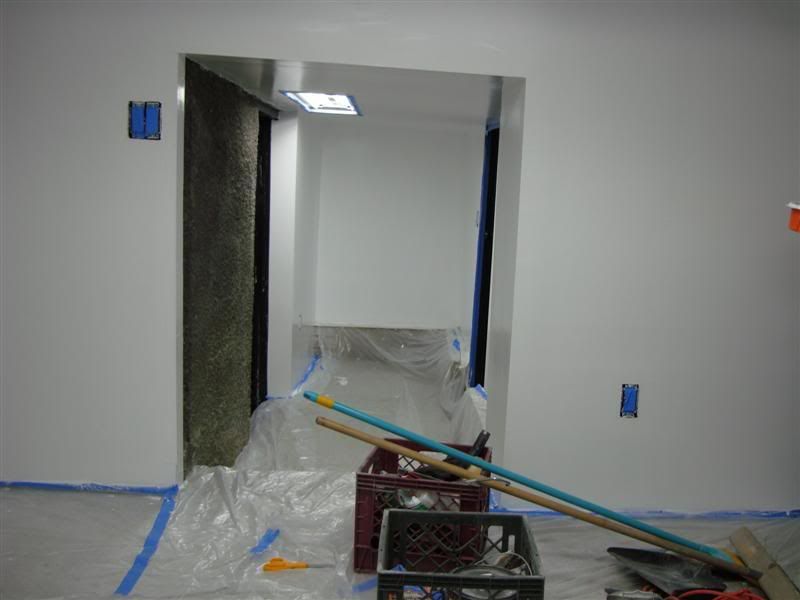 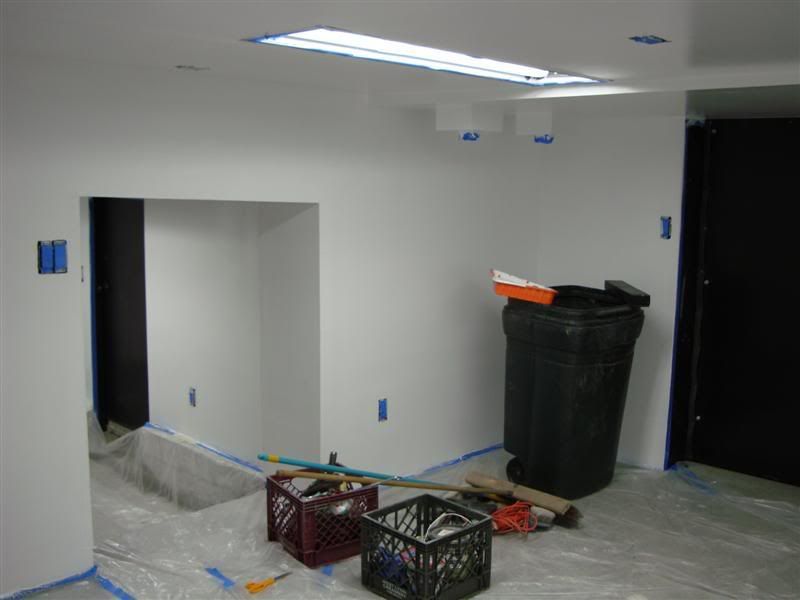 Intermittently I threw on all of the faceplates for the outlets and switches. Next, I installed the diamond plate baseboard. I was able to do the whole main room with it. I couldn't do the one piece of wall I wanted to do in the small room because there were a couple pieces missing from the order, so I alerted the company and they will be here this week. Besides that, the people were nice and attentive (diamondlife I think the company is called) and also, the stuff looks great!!! Here's the parts that I did: 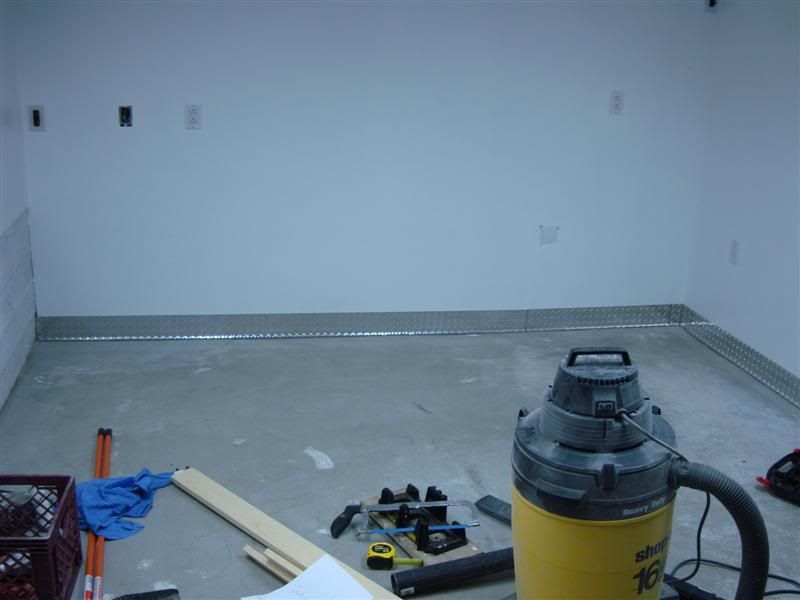  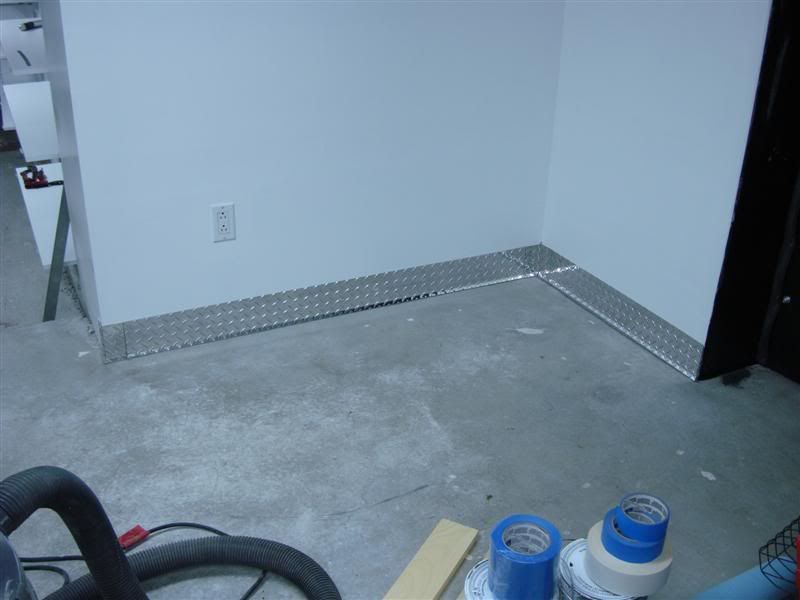 I used an aluminum-colored caulking meant for trim work to seal the baseboard to the floor all around the room. This means for washing the floor I never have to worry about moisture getting up under the wall, into the drywall and the wood. I could literally fill the room up with 4 inches of water. Here's a closeup of the caulking sealing the baseboard to the floor: 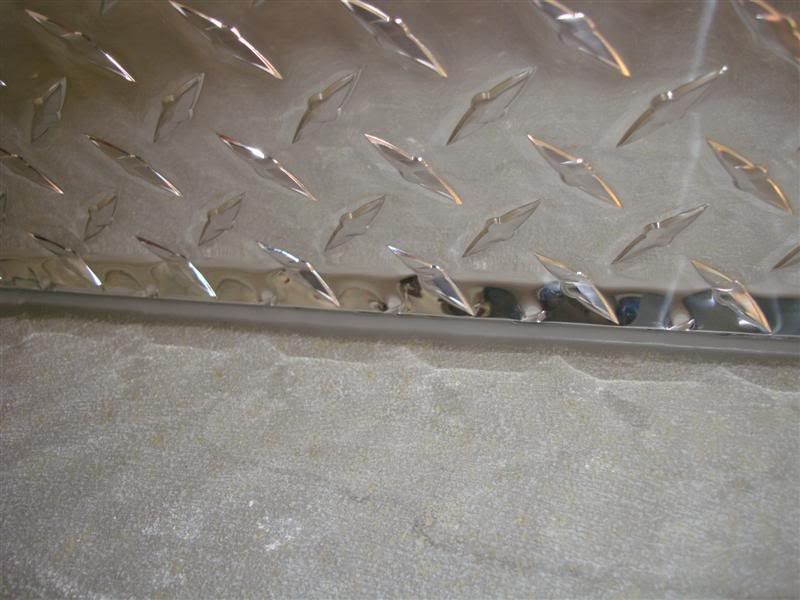 I installed shelving on all the walls in the small room. On the left are 8" deep shelves, the back wall has 12" deep shelves, and the whole right wall on either side of the doorway has 10" deep shelves. 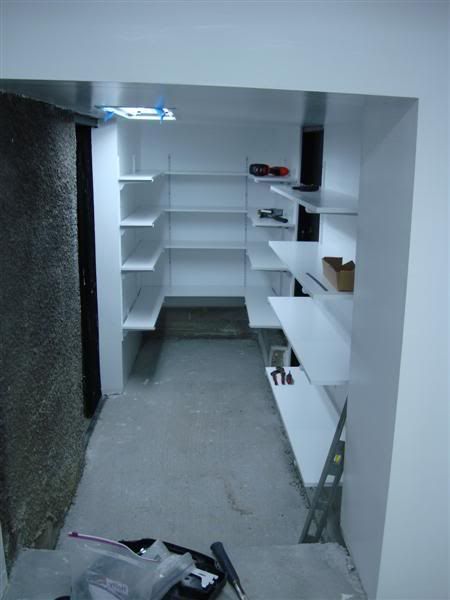 Here's a little bling I had lying around... a couple old street signs. The bike route sign is from chicago, forget how I came into that. I used a concrete nailer to hang 'em: 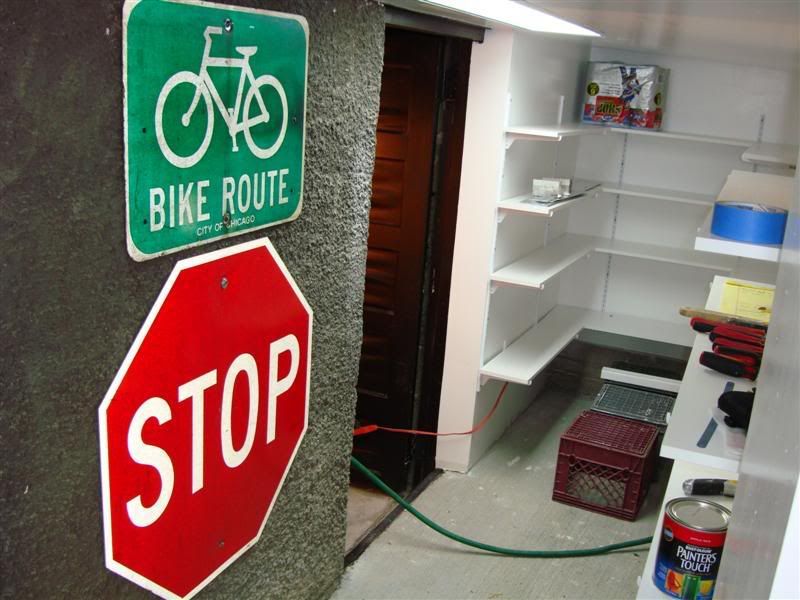 Because of the low overhang between rooms, I decided to paint some caution stripes on the threshold. Several people (including me once, forgetting to duck) had already hit their head. So I just measured off a bunch of stripes with a ruler and pencil, taped it up with painter's tape, and used some high gloss red paint:  Later, I pulled away the tape, and it came out pretty nicely I think: 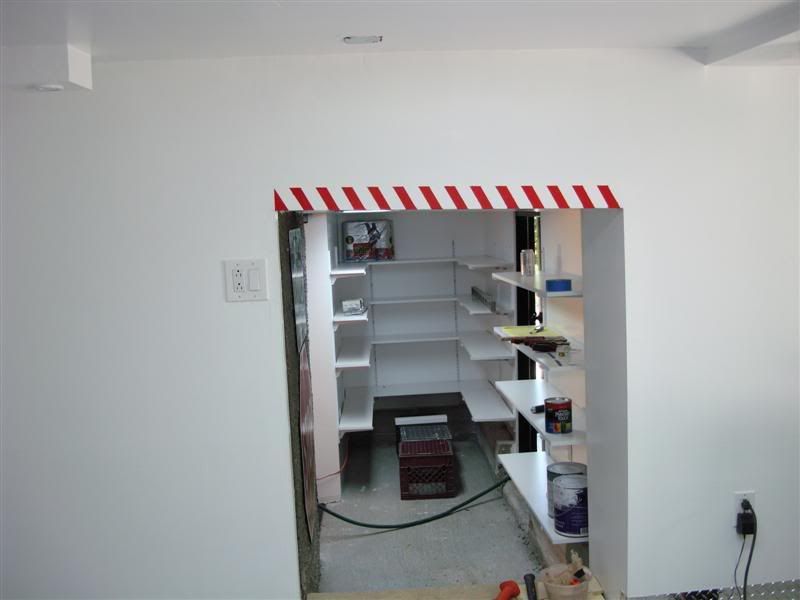 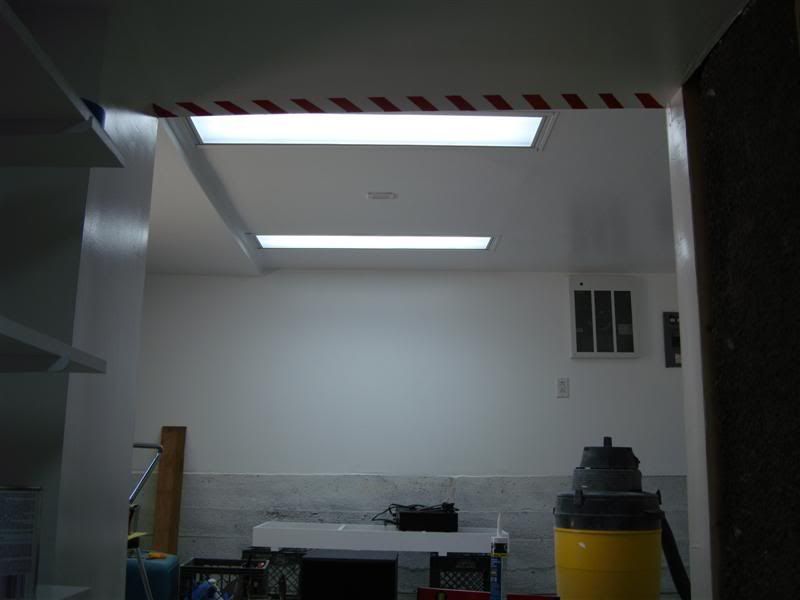 Next, I decided to take care of some more shelves in a few places. Since the shelves on the right wall in the small room are 10" deep, they protrude into the doorway a little bit. Thus, I figured I could utilize the space on the wall in the threshold between rooms. I don't like having tons of bottles and aerosol cans everywhere and not being able to find them when I need them, so I designed and built a little rig to hold them:  I also cut some plywood shelves for the speakers and my stereo. I painted those and the shelves I made for the cans/bottles: 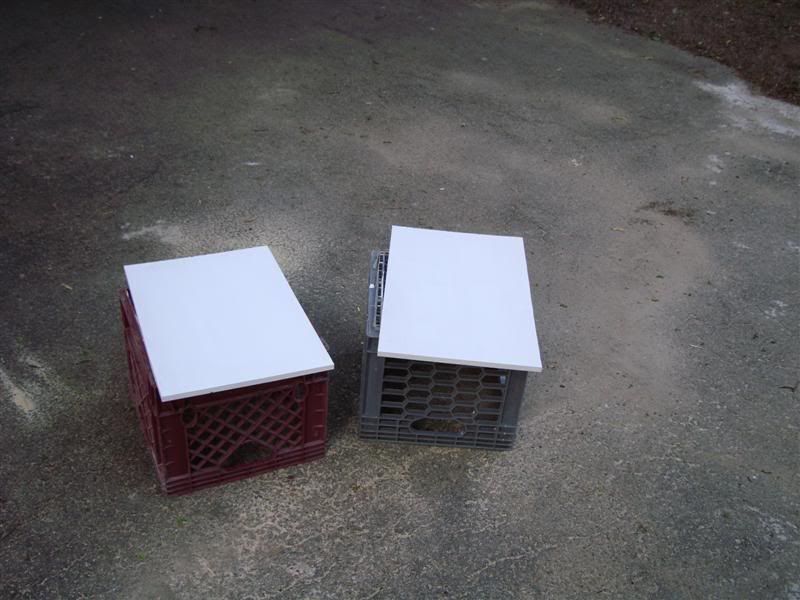 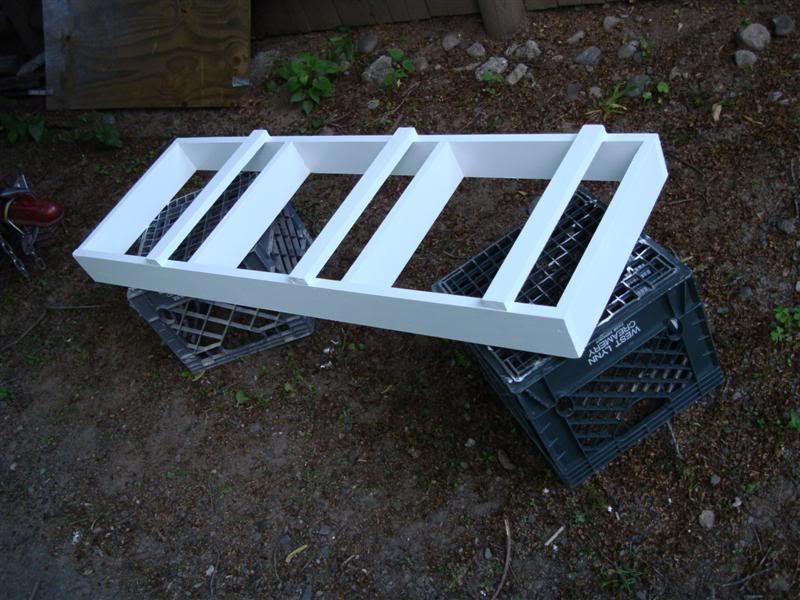 Then I installed the can rig I dreamt up. It fit pretty well and looks like it will be very handy: 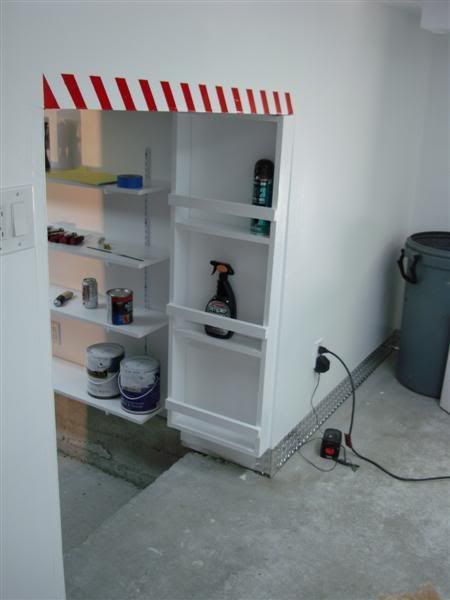 Also installed the shelves for the speakers and stereo, and wired up the speaker wire outlets they will all utilize: 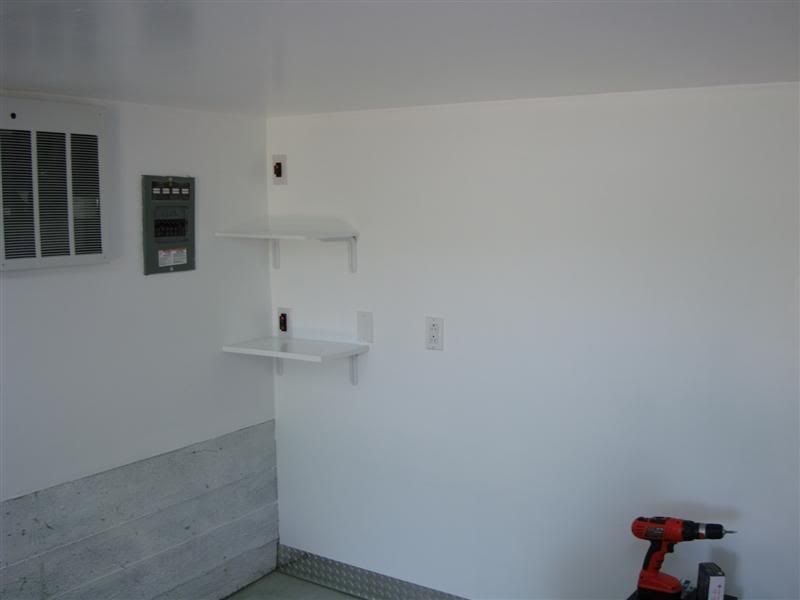 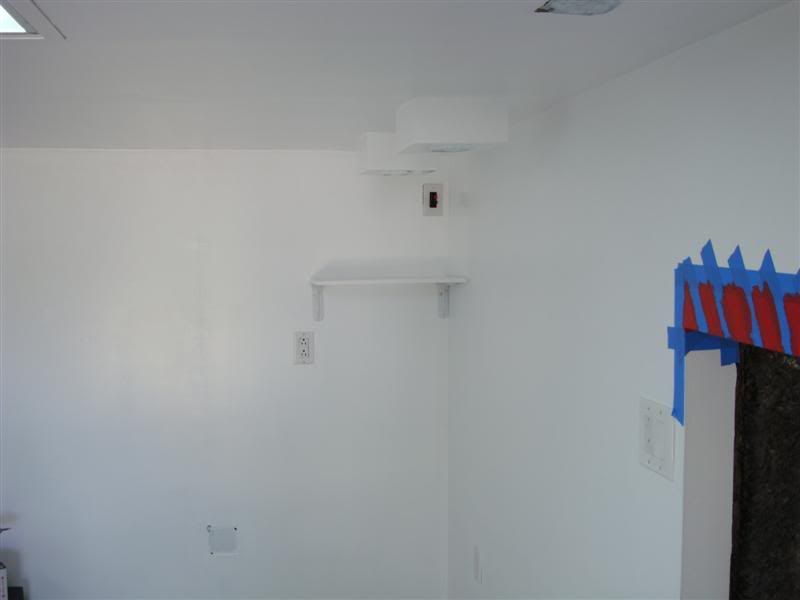 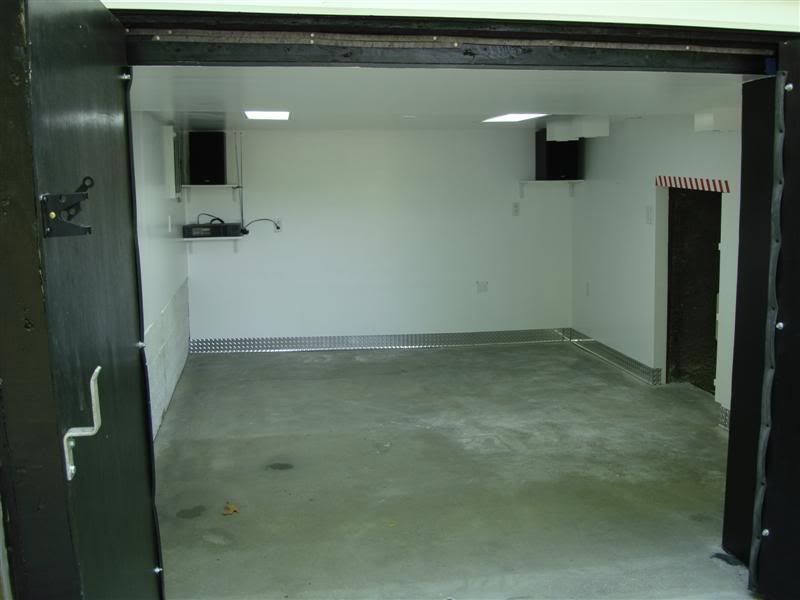 This last picture was right after I used a floor degreaser called greaseaid, a bristle brush on my hands and knees, and rags to clean the floor. That drywall dust is really ground in there pretty badly. I'm a little pissed about this, but I'm not sure it's worth the effort to get it all off right now since eventually I will need to prep the surface in both rooms for adherance of an epoxy floor coating when I have the time and money to do it. That will probably occur this fall. That is, unless someone has an easy solution for cleaning the floor that I could do quickly soon.
__________________
LRRS/CCS #123 Boston Moto Dunlop Woodcraft 35 Motorsports Sidi Pit Bull K&N Filters |
|
|
|
|
05-28-2008, 01:14 AM
|
#9 |
|
Pompous Prick
Join Date: Mar 2008
Location: MA
Moto: 06 R6 (race), 04 CRF Tard (race)
Posts: 3,040
|
Then, here's another trick I had up my sleeve... hung up this bad boy:
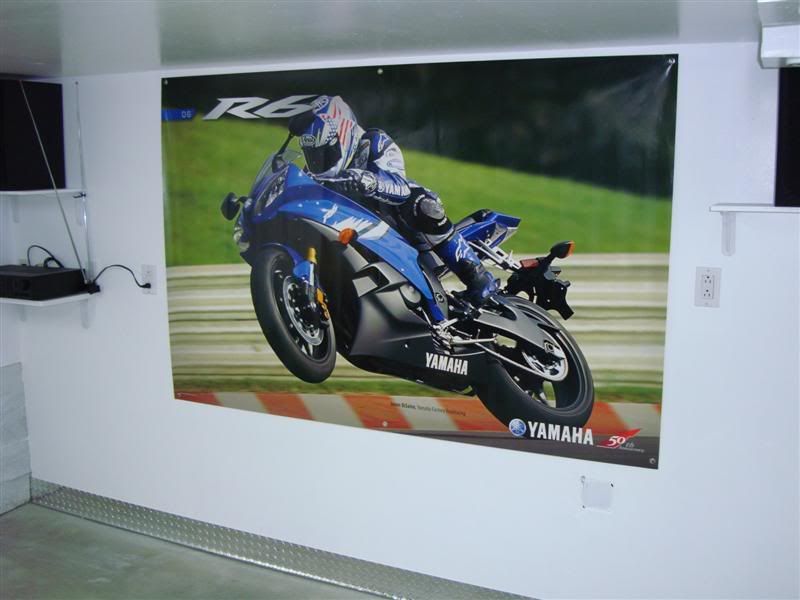 Then I opened up the craftsman roller chests I bought three or so months ago, finally. I bought them at that time because they were on a killer sale but haven't been able to bring them into the garage obviously. The 5-drawer top chest had been damaged from the manufacturer/shipper, the lid wouldn't close and when put down on level ground it wobbled. I had to take that back to sears and get a replacement. They gave me no trouble at all and gave me a brand new one in exchange right away. After that hiccup, I got them all set up. When everything is in place, the lid of the top chest JUST clears the recessed lighting boxes I built. Yeah, I planned it that way carefully... right... haha. Here's the chests: 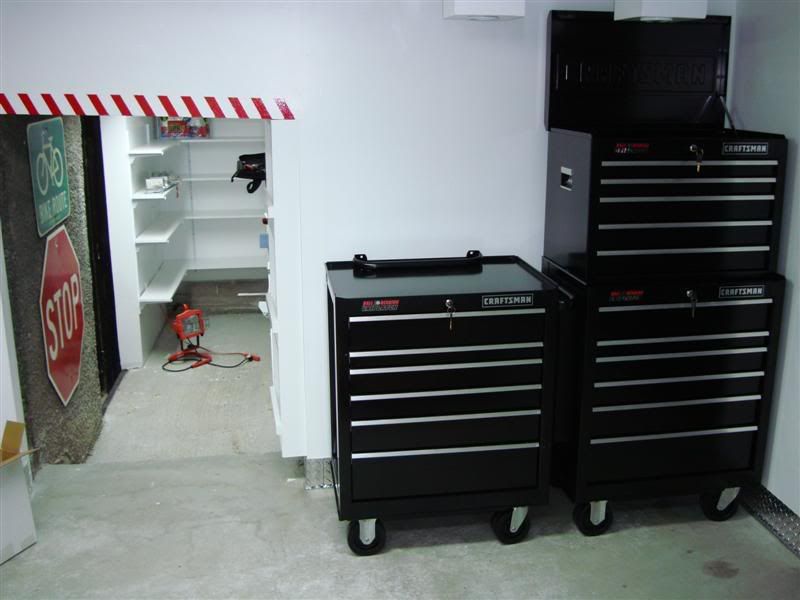 All the tool companies charge an arm and a leg for drawer liners for tool chests, like $20 a roll. I found rolls at harborfreight for $3, and got 11 rolls. This is enough to do all of my toolchests as well as the drawers that will be in my workbench when I build it. I test cut one drawer and the stuff is great, just as good quality as the craftsman (and others) drawer liners, nice and sticky, etc. Good way to save money for those of you who need some liners: 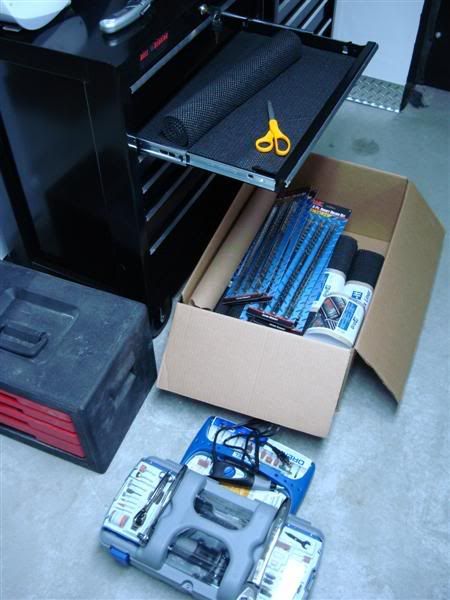 Then I started bringing stuff in from the main basement, like the bike and stands, my jack and jackstands, backup (old) tires, gas,more of my tools, etc. This is the garage in it's current state as I left it at the end of the weekend... basically 95% done!!!!!!!!!!  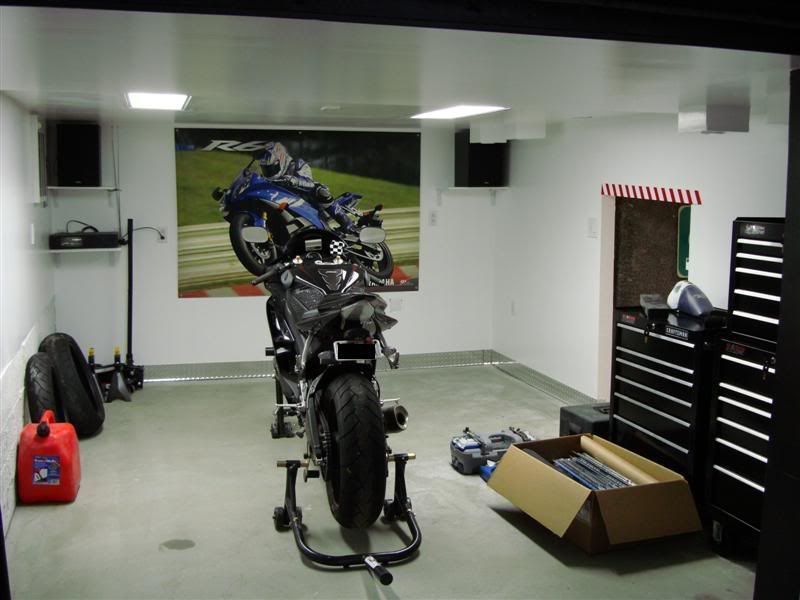 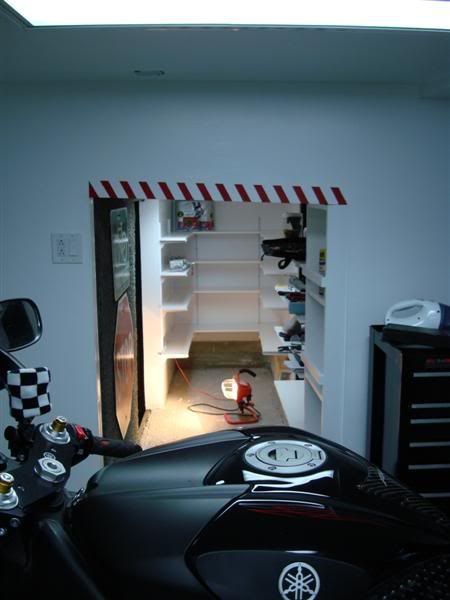 There is a bunch left to do, but for the most part, it's the way I want it. Short term to-do's: - Design and build workbench (I have a plan for this, just need to do it) - Procure man-fridge to fit under said workbench to harbor tasty adult beverages (this is a HUGE necessity  ) )- Get everything out of the main basement that is mine, and get it organized and onto shelves and into tool chests - Hang some hooks on the east wall for hanging up all my leathers and riding gear - Finish the plumbing: right inside the main basement near the black door, install a big shop sink. Also, finish hooking up the outside faucet for washing cars/bike so the hose doesn't need to be drug out there every time. Long-term to-do's: - Grind/sand/etc concrete floor in both rooms, acid wash it, then apply medium gray epoxy base, then red/white/black paint flakes, then a nice think clear epoxy topcoat - Buy a compressor, pour a concrete slab for it outside and build a 'doghouse' for it to 'live' in, plumb the air line in through the wall near the heater - Tackle the main basement... lots of organization, trashing, and a little lighting/electrical work in there. Nothing anywhere near close to the work in the garage though. I'll take a break for now And it's not COMPLETELY done yet, but I can't help look back at this picture and compare: 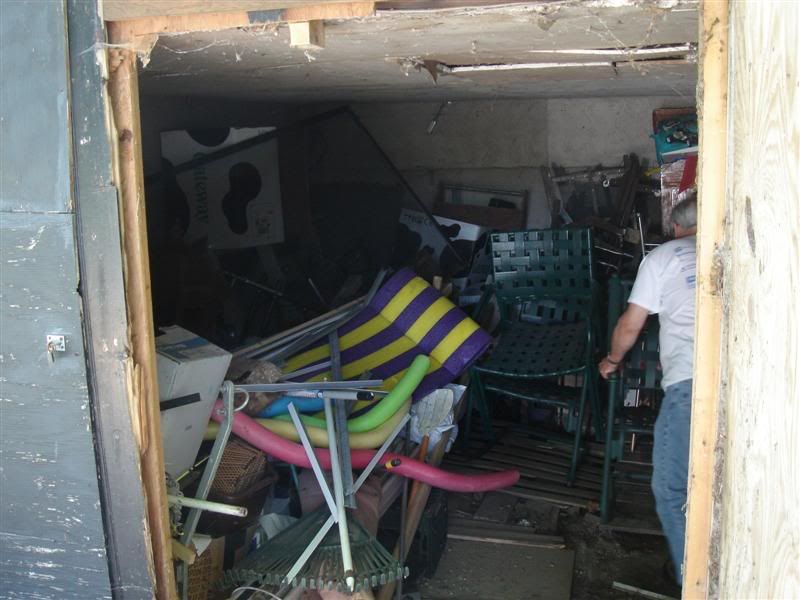 Next weekend I will be doing a little bit on the garage, but it will mostly be related to packing for my trip and prepping the bike (this will include an onboard camera setup ) for the trip and all the track days involved. I will be gone for about two weeks, doing at least 3 track days, 5 days in deal's gap, 4 or 5 relaxing in SC, driving 2500-ish miles with the bike on the trailer, and doing a 1-day work thing on the way back. Extremely psyched for this trip.
__________________
LRRS/CCS #123 Boston Moto Dunlop Woodcraft 35 Motorsports Sidi Pit Bull K&N Filters |
|
|
|
 |
| Bookmarks |
|
|


 Hybrid Mode
